
Auto Glass Repair
TL;DR:
- Windshield scratches need professional assessment if they catch a fingernail, are in the driver’s view, or near the edge. DIY polishing with cerium oxide works only on light surface scratches outside critical zones, while deeper or unsafe damage requires expert repair or replacement. Properly repairing or replacing a windshield ensures safety and maintains driver assistance systems, especially with ADAS-equipped vehicles.
Scratched windshield repair is defined as the process of assessing glass damage by depth, size, and location, then applying polishing, resin injection, or full replacement to restore optical clarity and structural safety. Not every scratch needs a shop visit, but the wrong call can cost you far more than a repair bill. Portland drivers deal with gravel roads, wet winters, and worn wiper blades that leave marks across the glass year-round. The Fingernail Test is the simplest field tool for assessing scratch depth: run your fingernail across the mark. If it catches, the scratch is too deep for DIY polishing and requires professional evaluation. Collision Auto Glass & Calibration has handled auto glass scratch repair in the Portland area since 2008, and the guidance below reflects what actually works.
How to assess the severity of your windshield scratches
Scratch depth is the first factor that determines your repair path. The Fingernail Test gives you an immediate, reliable answer: if your nail glides over the mark without catching, you are dealing with a surface scuff that polishing can address. Scratches that catch a fingernail are too deep for simple polishing and typically require professional repair or replacement for safety.
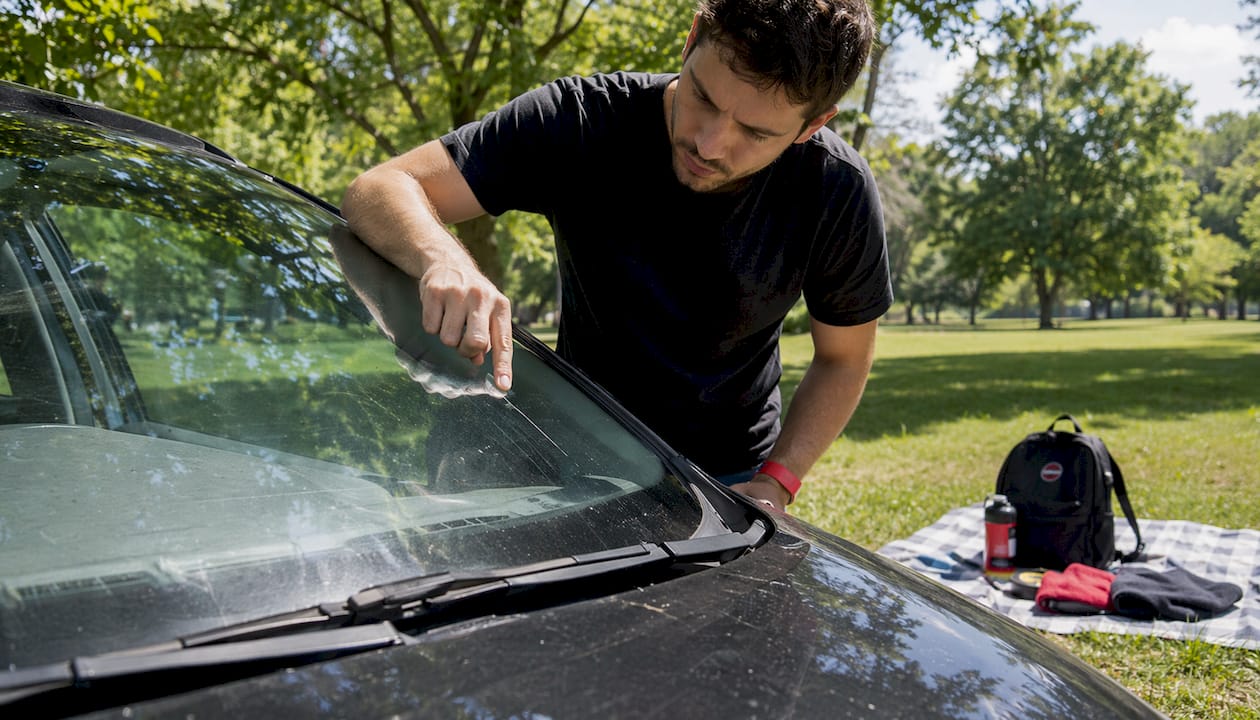
Location matters just as much as depth. A scratch sitting directly in the driver’s primary line of sight is a safety hazard regardless of how shallow it appears. Windshield damage in the driver’s line of sight generally requires replacement over repair because repairs can cause optical distortion that affects night driving safety. Wiper scratches on windshields often fall right in this zone, making them more serious than they look.
Edge placement is the other critical factor. Damage within 1–2 inches of the windshield edge compromises structural integrity and typically mandates replacement. The windshield contributes to roof support during a rollover, so edge damage is never a cosmetic issue.
Here is a quick reference for assessing your situation:
- Surface scuff: Nail glides over it, no catching. Located outside the driver’s view zone. Safe for DIY polishing.
- Moderate scratch: Nail catches slightly. Located on the passenger side or periphery. Professional assessment recommended.
- Deep scratch: Nail catches firmly. Any location. Professional repair or replacement required.
- Edge damage: Within 1–2 inches of the frame. Replacement required regardless of depth.
- Driver’s view zone damage: Any depth. Replacement is the standard recommendation.
Pro Tip: Photograph the scratch in direct sunlight before attempting any repair. The image will show you the true length, depth, and whether the scratch branches, which helps a technician give you an accurate quote.
DIY methods to remove or reduce light windshield scratches
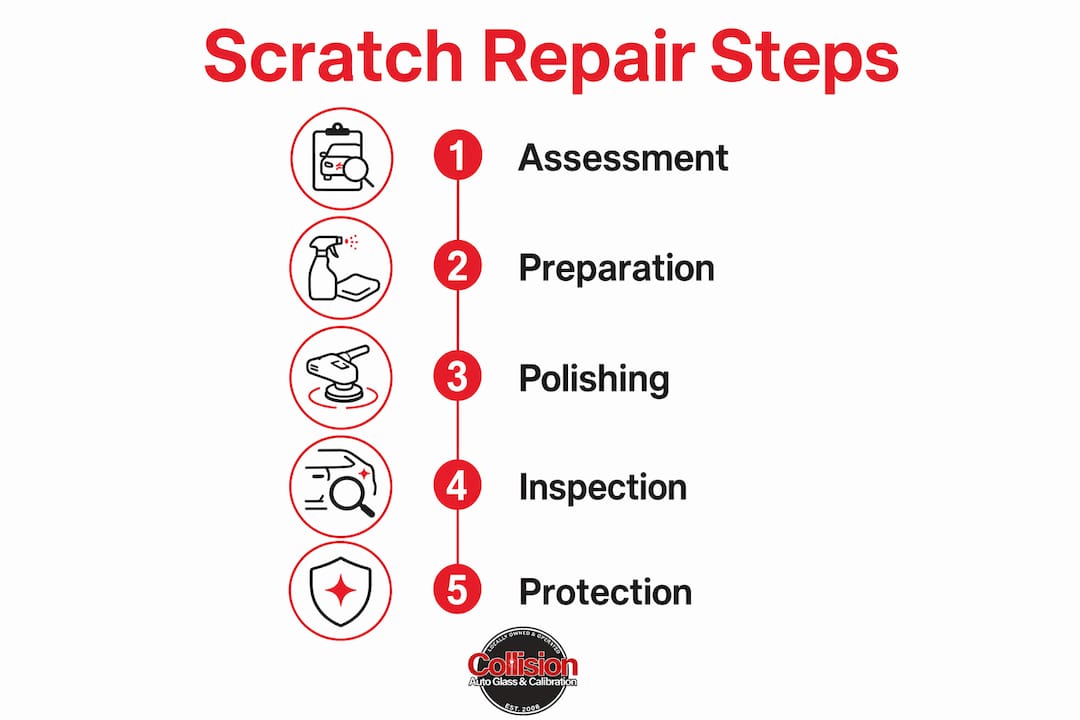
Light surface scratches, the kind your fingernail slides over cleanly, can often be reduced or eliminated at home using cerium oxide polishing compound. This is the same abrasive used in professional glass shops, and it works by micro-abrading the glass surface to level out shallow marks. The key word is “shallow.” Attempting this on deeper scratches creates a “funhouse mirror effect” where uneven glass removal produces vision-distorting wavy spots that are worse than the original scratch.
Tools and materials you will need
| Item | Purpose |
|---|---|
| Cerium oxide powder or paste | Primary polishing compound for glass |
| Buffing pad (felt or foam) | Applies compound evenly without scratching |
| Microfiber cloths | Cleaning and residue removal |
| Masking tape | Protects surrounding paint and trim |
| Spray bottle with water | Keeps the compound moist during buffing |
| Acrylic scratch filler (optional) | Temporary fill for slightly deeper surface marks |
Step-by-step cerium oxide polishing
- Clean the glass thoroughly. Use a glass cleaner and microfiber cloth to remove all dirt, oil, and debris. Any contaminant left on the surface will scratch the glass further during buffing.
- Tape off the surrounding area. Apply masking tape around the scratch to protect paint, rubber seals, and trim from the compound.
- Mix the cerium oxide. Combine powder with water to form a paste roughly the consistency of toothpaste. Pre-mixed paste products skip this step.
- Apply compound to the buffing pad. Use a small amount. More compound does not mean faster results.
- Buff in circular motions with light pressure. Work in 30-second intervals. Keep the pad damp by misting with water. Never buff dry glass with cerium oxide.
- Wipe clean and inspect. Use a clean microfiber cloth to remove residue, then check progress. Repeat up to three cycles for stubborn surface marks.
- Rinse the area completely. Cerium oxide residue left on glass will dry into a haze.
Two common shortcuts cause more damage than they fix. Toothpaste and baking soda are too abrasive for automotive glass and will create micro-scratches across the surface. WD-40 temporarily fills a scratch and makes it look better in photos, but it evaporates within days and leaves an oily film that reduces visibility.
Pro Tip: Work in a shaded area or indoors. Direct sunlight dries the compound too fast, which increases friction and risks creating new surface marks.
When and why professional windshield scratch repair or replacement is necessary
Professional repair becomes necessary the moment a scratch catches your fingernail, sits in the driver’s view zone, or approaches the windshield edge. At that point, DIY polishing does not just fail to help. It actively makes the situation worse by removing glass unevenly and introducing optical distortion.
The professional standard for repairable damage uses vacuum pressure resin injection followed by UV curing. This process restores up to 95% optical clarity and 100% structural strength in qualifying repairs. That level of restoration is not achievable with consumer-grade kits, which lack vacuum resin technology and risk distortion if used on anything deeper than a surface scuff.
Replacement becomes the only safe option in several specific scenarios:
- The scratch is in the driver’s primary line of sight and causes any light refraction or glare.
- The damage is within 1–2 inches of the windshield edge.
- The scratch is longer than a few inches or has branched into a crack.
- Your vehicle has ADAS (Advanced Driver Assistance Systems) cameras mounted at or near the windshield.
That last point deserves attention. ADAS camera systems require pristine windshield condition. Scratches or repairs in their field of vision interfere with lane-keep assist, automatic emergency braking, and other safety features. After any replacement, professional ADAS calibration is required to restore those systems to factory accuracy. Collision Auto Glass & Calibration performs in-house ADAS calibration, which means the recalibration happens at the same appointment as the glass work. You can read more about why calibration matters before scheduling any replacement.
“The refractive index difference between repair resin and glass makes any repair visible under certain lighting conditions. This is why damage location is the most critical factor in every repair decision. A technically successful repair in the driver’s line of sight can still compromise safety.”
Typical scratch repair times range from 30–90 minutes depending on severity. Full replacement with ADAS calibration takes longer. Collision Auto Glass & Calibration offers same-day service for most repairs in the Portland area, so the time investment is manageable.
What does windshield scratch repair actually cost?
Repair costs and replacement costs occupy very different price ranges. Scratch repairs typically run $100–$300, while full replacements range from $400–$1,000 or more when ADAS calibration is included. The gap between those numbers makes early repair a straightforward financial decision.
Several factors push costs up or down:
- Scratch depth and length: Deeper or longer damage requires more labor and may cross into replacement territory.
- Location on the glass: Driver’s view zone damage almost always means replacement, which costs more.
- Vehicle type: Luxury vehicles and trucks with large windshields cost more to replace due to glass size and OEM-quality glass requirements.
- ADAS systems: Any vehicle with cameras or sensors mounted at the windshield adds calibration cost to a replacement.
- Insurance coverage: Comprehensive auto insurance often covers windshield repair with no deductible. Replacement coverage varies by policy.
Temperature fluctuations can expand small scratches into full cracks within hours, especially during Portland’s seasonal swings between cold rain and summer heat. A $150 repair left unaddressed can become a $700 replacement in a single hot afternoon. Collision Auto Glass & Calibration handles direct insurance billing, which removes the paperwork burden from the repair process. For a detailed breakdown of what affects your specific vehicle, the windshield replacement cost guide covers the variables in full.
How to prevent windshield scratches and protect your glass
Prevention costs nothing and saves significantly over time. The most common source of wiper scratches on windshields is a worn or damaged wiper blade dragging grit or a bent metal arm across the glass. Replace wiper blades every six to twelve months, or sooner if you notice streaking or skipping. Portland’s rainy season puts wiper blades under constant stress, so checking them in the fall before the heavy rain starts is a practical habit.
- Clean your windshield before running wipers. Running dry wipers over dust or debris is the fastest way to create surface scratches.
- Avoid abrasive cleaners. Household glass cleaners with ammonia can degrade the glass surface over time. Use automotive-grade glass cleaner only.
- Park away from gravel lots when possible. Loose stone kicked up by other vehicles is a primary cause of surface damage.
- Inspect the glass monthly. Catching a small scratch early keeps your options open. Waiting until it spreads limits them.
- Get professional inspections after any windshield work. Contaminants trapped in older damage negatively affect repair resin bonding, so prompt attention to new marks preserves repair quality.
Pro Tip: Apply a hydrophobic glass treatment like Rain-X to your windshield twice a year. It reduces the friction between wiper blades and glass, which extends blade life and reduces the chance of surface scratches.
Key Takeaways
Scratched windshield repair is only safe and effective when the scratch depth, size, and location all fall within repairable limits. Anything deeper than a surface scuff, or positioned in the driver’s line of sight, requires professional evaluation.
| Point | Details |
|---|---|
| Use the Fingernail Test first | If your nail catches the scratch, skip DIY and call a professional. |
| Location determines the repair path | Driver’s view zone and edge damage require replacement, not polishing. |
| Cerium oxide is the right DIY tool | Use it only on surface scuffs; deeper scratches need vacuum resin injection. |
| Delay increases cost | Small scratches expand into cracks quickly, especially in temperature swings. |
| ADAS vehicles need calibration | Any windshield replacement on a camera-equipped vehicle requires professional recalibration. |
What we have learned from 17 years of windshield repairs in Portland
The most common mistake we see is a car owner who polished a scratch themselves, made it look better for a week, and then came to us with a wavy distortion across their driver’s view that was not there before. Cerium oxide in the wrong hands on the wrong scratch does not just fail. It creates a new problem that is harder to fix than the original one.
The second most common misconception is that WD-40 or clear nail polish is a legitimate repair. Both are temporary cosmetic masks. Neither bonds to glass, neither restores structural integrity, and both leave residue that interferes with professional resin bonding if you later need a proper repair. We cover more of these common auto glass myths on our site because we see their consequences regularly.
What actually matters in every scratch case is depth and location. Those two factors determine everything else. A long scratch on the passenger side that does not catch a fingernail is often repairable and inexpensive. A short scratch directly in front of the driver that catches a nail is a replacement conversation, full stop. The geometry of the damage matters more than the size.
For modern vehicles with ADAS, the calculus shifts further toward professional involvement. We have seen cars come in where a previous shop replaced the glass but skipped calibration, and the lane-keep assist was pointing the car toward the shoulder. That is not a minor inconvenience. It is a safety failure. If your vehicle has cameras or sensors at the windshield, ADAS calibration is not optional after replacement.
Our honest advice: assess with the Fingernail Test, attempt DIY only on confirmed surface scuffs in non-critical zones, and call a professional the moment you have any doubt about depth or location.
— Collision Auto Glass & Calibration
Professional scratch repair and glass services in Portland
Collision Auto Glass & Calibration provides expert windshield damage assessment, scratch repair, full replacement, and in-house ADAS calibration for Portland and Tualatin drivers. Every repair starts with a thorough evaluation of scratch depth, location, and your vehicle’s safety systems, so you get the right solution the first time.

Same-day service is available for most repairs, and the team handles direct insurance billing so you are not stuck managing paperwork. The lifetime no-leak guarantee on all installations means your repair is backed long after you leave the shop. Before you book, read through the tips for choosing an auto glass shop to understand what separates a certified shop from a cut-rate alternative. When you are ready, request a quote directly through the website for a fast, no-pressure estimate.
FAQ
Can windshield scratches be repaired without replacement?
Yes, surface-level scratches that do not catch a fingernail can often be repaired using cerium oxide polishing. Deeper scratches, edge damage, or marks in the driver’s line of sight typically require professional repair or full replacement.
How much does windshield scratch repair cost?
Minor scratch repairs generally cost $100–$300. Full windshield replacement ranges from $400–$1,000 or more, with ADAS calibration adding to the total on camera-equipped vehicles.
What causes wiper scratches on a windshield?
Worn wiper blades, bent wiper arms, or running wipers over dry debris are the primary causes. Replacing blades every six to twelve months and cleaning the glass before activating wipers prevents most wiper-related scratches.
Is DIY windshield scratch repair safe?
DIY repair is safe only for confirmed surface scuffs outside the driver’s view zone. Consumer kits lack vacuum resin technology and can create optical distortion if used on deeper scratches, making the damage worse.
How long does professional scratch repair take?
Professional scratch repair typically takes 30–90 minutes. Full windshield replacement with ADAS calibration takes longer, though same-day service is available at Collision Auto Glass & Calibration for most Portland-area vehicles.
Recommended
- Is It Illegal to Drive with a Cracked Windshield in Portland, Oregon? – Collision Auto Glass & Calibration
- Can You Fix A Cracked Windshield Without Replacing It? – Collision Auto Glass & Calibration
- Is It Illegal to Drive with a Cracked Windshield in Beaverton, Oregon? – Collision Auto Glass & Calibration
- How to Temporarily Fix a Crack in Portland, OR – Collision Auto Glass & Calibration
Share
Recent Posts
September 5, 2026
$20–$1,000+: DIY or Pro for Windshield Molding Replacement
Decide whether to DIY windshield molding replacement or call a pro. See parts costs ($20–$150), shop quotes to $1,000+, plus rust, encapsulation, and...

September 4, 2026
Static First, Dynamic Confirm: ADAS Calibration for Technicians
ADAS guide for technicians: when to run static before dynamic calibration. Includes a shop checklist and one visit workflow....

September 3, 2026
Portland Mobile Windshield Costs: $60 to $800 and When Insurance Pays
Portland mobile windshield costs, from $60 chip repairs to $300–$800 replacements. See when Oregon insurance covers glass and get a free mobile quote....