Auto Glass Repair
If your vehicle has a forward-facing camera mounted to the windshield, the answer is yes — you need ADAS calibration after windshield replacement. Most vehicles built since around 2019 with features like automatic emergency braking, lane-keeping assist, or adaptive cruise control require it. A minor chip repair that leaves the original glass in place usually does not trigger this requirement, but a full removal does.
Before you book any shop, ask three questions: Does the shop look up the OEM procedure by VIN? Do they perform static calibration in-house? Will they provide a post-calibration scan report? If any answer is no, find a different shop.
The most common calibration triggers:
- Full windshield removal and replacement
- Camera bracket removal or camera transfer to new glass
- Front-end collision repairs affecting the camera mount
- Suspension or ride-height changes (including alignment work)
- Any active ADAS warning light after glass work
Key Takeaways
Most vehicles built after 2019 with a forward-facing camera require ADAS calibration after windshield replacement, with the specific method — static, dynamic, or dual — determined by the OEM procedure for your VIN.
| Point | Details |
|---|---|
| Calibration is required for most modern vehicles | Any vehicle with a windshield-mounted forward camera needs recalibration after full glass removal. |
| VIN determines the method | Static, dynamic, or dual calibration is set by the OEM procedure for your specific vehicle, not by the shop’s preference. |
| Cost ranges by method | Static runs $150–$300; dynamic $100–$250; dual $250–$500, separate from the windshield replacement cost. |
| Insurance often covers it | Comprehensive glass claims frequently include calibration — verify with your insurer before the appointment, not after. |
| Always request scan reports | A pre- and post-calibration scan report is your proof the work was completed to OEM spec; do not leave without one. |
| Collision Auto Glass & Calibration | Performs in-house ADAS calibration with OEM software, provides scan reports, and handles direct insurance billing in Portland. |
Table of Contents
- Does windshield replacement require ADAS calibration?
- When is calibration required after a windshield job?
- Static, dynamic, and dual calibration explained
- How long does calibration take, what does it cost, and does insurance cover it?
- Which shops can perform ADAS calibration, and what to ask before you book
- What happens during a calibration appointment
- What happens if you skip calibration?
- Troubleshooting when calibration doesn’t work the first time
- What a reputable in-house calibration process looks like
- Collision Auto Glass & Calibration handles the whole job in-house
- Sources
- FAQ
Does windshield replacement require ADAS calibration?
Your windshield does more than keep rain out. On most modern vehicles, it is the mounting surface for a forward-facing camera that feeds data to automatic emergency braking (AEB), lane-keeping assist, adaptive cruise control, and traffic sign recognition. When that glass comes out, the camera’s angle, height, and optical path all shift — even slightly. ADAS components must work in precise coordination, so even a minor physical disturbance like a windshield replacement can compromise the system and make proper recalibration necessary.
The camera bracket bonds to the glass itself, not the frame. When a technician transfers the bracket to new glass, the mounting geometry changes by fractions of a millimeter. Those fractions matter because the camera’s field of view is calculated to OEM tolerances measured in tenths of a degree. Windshield optics also vary between manufacturers: the curvature, tint, and coating of aftermarket glass can bend the camera’s line of sight differently than the original pane did.
ADAS features that depend directly on this camera alignment include:
- Automatic Emergency Braking (AEB): detects vehicles and pedestrians ahead
- Lane Departure Warning and Lane-Keeping Assist: reads lane markings
- Adaptive Cruise Control: tracks the vehicle ahead at highway speeds
- Traffic Sign Recognition: reads speed limit and warning signs
- Forward Collision Warning: triggers alerts before AEB engages
BMW repair instructions explicitly require calibration of safety systems after windshield replacement and specify that BMW ISTA diagnostic software must be used, along with OEM original glass where applicable. BMW is not an outlier — this is the standard across most OEM service manuals for vehicles with windshield-mounted cameras.
When is calibration required after a windshield job?
The short answer: whenever the original glass leaves the vehicle. The longer answer depends on your VIN.
OEM manufacturers set the required calibration method at the VIN level, which means the same model year can have different requirements depending on the trim and installed safety package. A base-trim sedan without a forward camera may need nothing; the same model in a higher trim with a full ADAS suite requires a documented calibration procedure.
Scenarios that require calibration:
- Full windshield removal and replacement (the most common trigger)
- Camera or bracket removal during any repair
- Front-end collision work that disturbs the camera mount or A-pillar
- Suspension repairs, lowering kits, or alignment changes that alter ride height
- Any ADAS-related warning light that appears after glass work
- Replacement of the camera unit itself
Scenarios that typically do not require calibration:
- A minor rock chip repair where the original glass stays in place and the camera is undisturbed
- Rear or side window replacement on vehicles where the forward camera is not involved
- Older vehicles (generally pre-2015) without forward-facing ADAS cameras
To confirm your vehicle’s specific requirement, check the owner’s manual under “windshield replacement” or “ADAS,” ask the shop to pull the OEM service bulletin for your VIN, or use a resource like AllData to look up the procedure. You can also find VIN-based guidance that walks through common scenarios by make and model.
Static, dynamic, and dual calibration explained
Not all calibrations work the same way. The OEM for your vehicle determines which method applies, and the difference has real implications for appointment time, cost, and whether the work can be done on-site or requires a road drive.
Static calibration
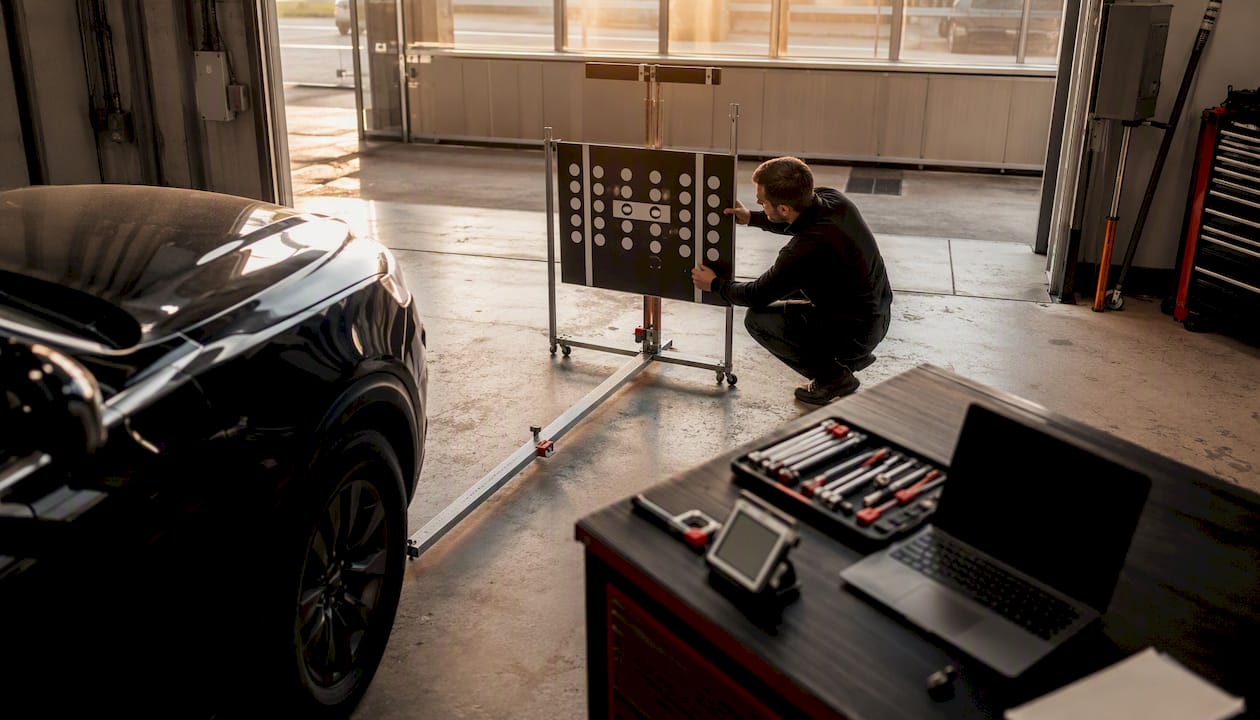
Static calibration happens entirely inside the shop. The technician positions a manufacturer-specific target board at a precise distance and height in front of the vehicle, on a level floor, in controlled lighting. A scan tool running OEM-approved software reads the camera’s output against the target and adjusts the system parameters until the camera’s view matches OEM specifications. The whole process typically takes 45–90 minutes. Because it requires a level indoor bay and exact target placement, static calibration cannot be completed at a mobile install site — a driveway or parking lot simply does not meet the environmental requirements.
Dynamic calibration
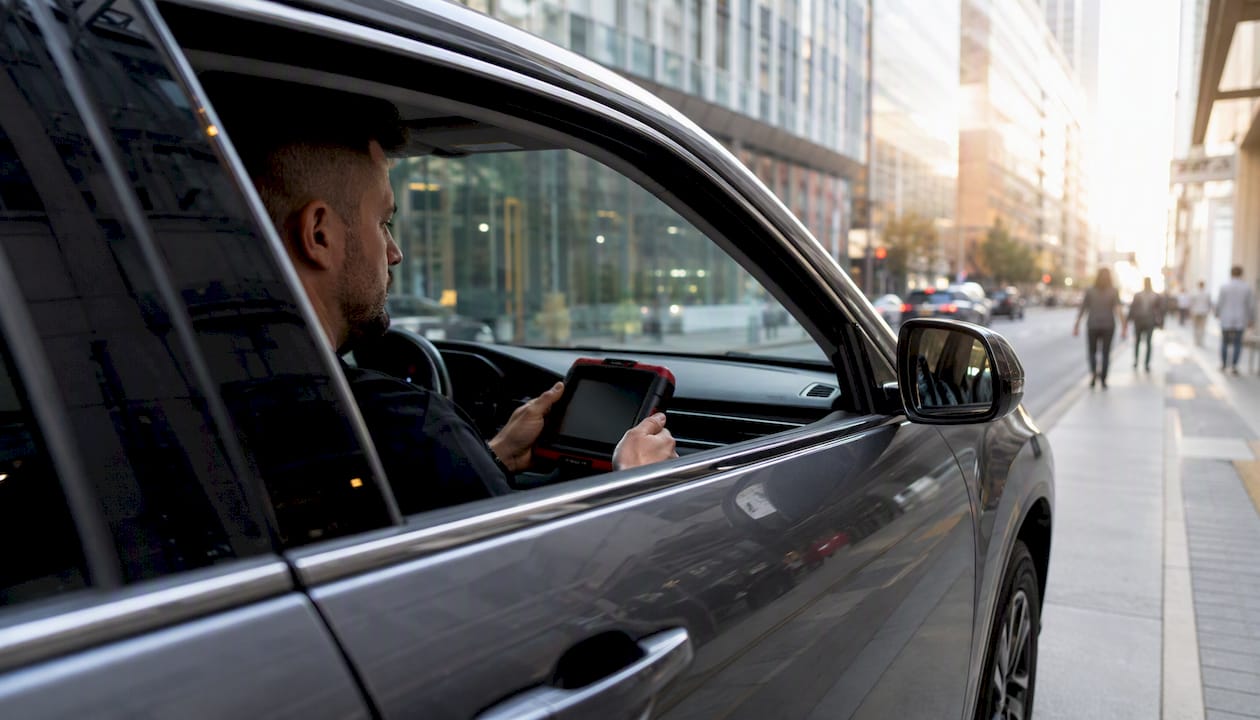
Dynamic calibration skips the target board and instead uses real-world driving. The technician takes the vehicle on a road drive at specified speeds, typically 35–65 mph, on a road with clear lane markings and good lighting. The scan tool monitors the camera’s output as the vehicle moves and confirms the system is reading the environment within OEM tolerances. Dynamic calibration depends heavily on road conditions — poor lane markings, low light, or heavy traffic can cause the procedure to fail and require a repeat drive.
Dual calibration
Some systems require both. Subaru EyeSight, Toyota Safety Sense 3.0, and BMW Driving Assistance Pro are among the OEM suites that explicitly require a static baseline followed by a dynamic road verification for recent model years. The static step sets the reference point; the dynamic step confirms real-world performance. Reputable shops produce two separate scan reports for dual calibrations, one for each step. This has direct implications for same-day service — a dual calibration adds road-drive time on top of the shop appointment.
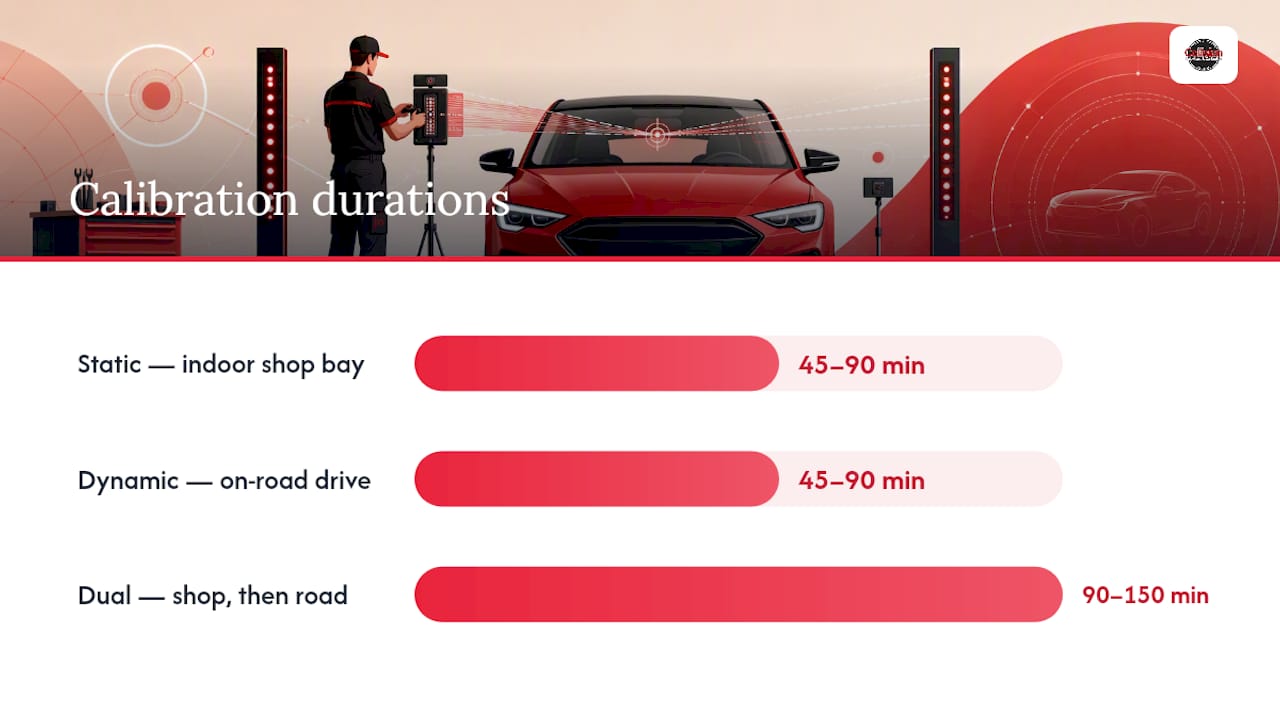
| Calibration Type | Where It Happens | Typical Duration | OEM Examples |
|---|---|---|---|
| Static | Indoor shop bay | 45–90 minutes | Honda Sensing, Mazda i-Activsense |
| Dynamic | On-road drive | 45–90 minutes | Some Ford Co-Pilot configurations |
| Dual (static + dynamic) | Shop, then road | 90–150 minutes total | Subaru EyeSight, BMW Driving Assistance Pro, Toyota Safety Sense 3.0 |
Pro Tip: If your mobile installer completes the glass work at your home or office, ask specifically whether static calibration is included or whether you need a follow-up shop visit. Many mobile installs require a return appointment for static work — knowing this upfront prevents a second trip from catching you off guard.
How long does calibration take, what does it cost, and does insurance cover it?
Time and cost both depend on which calibration method your vehicle requires.
Static calibration typically costs within a moderate industry range; dynamic calibration generally costs somewhat less; dual calibration is more expensive than either alone., with the method determined by the OEM for your specific VIN. These figures represent the calibration service alone, separate from the windshield replacement itself.
For a current local estimate, the ADAS calibration cost guide covers Portland-area pricing and insurance handling in detail.
Insurance coverage is the piece most vehicle owners overlook. Comprehensive auto insurance policies commonly cover windshield replacement, and many of those policies extend that coverage to include required ADAS calibration as part of the same claim. The critical step is verifying this before the appointment, not after. Call your insurer and ask two specific questions: Is ADAS calibration covered under my comprehensive glass claim? Does the shop need to bill it as a separate line item or as part of the windshield replacement? Shops that offer direct insurance billing can handle this conversation on your behalf, which removes the back-and-forth from your plate entirely.
Which shops can perform ADAS calibration, and what to ask before you book
Not every shop that replaces windshields is equipped to calibrate ADAS systems. The gap between a shop that can install glass and one that can properly recalibrate a forward camera is significant, and it is not always visible from the outside.
A properly equipped shop needs OEM-approved diagnostic software (BMW ISTA for BMW vehicles, for example), a calibrated target rig specific to the makes they service, a level indoor bay with controlled lighting, documented technician training, and the ability to produce a post-calibration scan report. Dealerships typically have all of this for their own brand. Full-service collision shops with dedicated ADAS equipment often cover multiple makes. Mobile-only glass installers frequently lack the indoor bay and target hardware required for static calibration.
For collision-repair context on when ADAS systems need reprogramming, Car Geeks Collision’s overview explains the triggers clearly.
Six questions to ask any shop before booking:
- Do you look up the OEM calibration procedure by VIN before starting?
- Do you perform static calibration in-house, or do you subcontract it?
- Can you show me a post-calibration scan report before I drive away?
- Is the replacement glass OEM or OEM-compatible, and does it affect calibration?
- Is calibration included in the quote, or is it billed separately?
- Do you handle direct insurance billing for the calibration line item?
Shops that answer all six confidently, with specifics, are the ones worth booking. Choosing the right auto glass shop comes down to exactly these criteria.
What happens during a calibration appointment
A well-run calibration appointment follows a clear sequence. Knowing the steps helps you verify the shop is doing the job correctly.
- VIN lookup and OEM procedure review: the technician confirms the required calibration method for your specific vehicle before touching anything
- Pre-scan: a diagnostic scan tool reads all stored fault codes and documents the vehicle’s baseline condition
- Camera and bracket inspection: the technician checks that the bracket is correctly seated and bonded to the new glass before calibration begins
- Static setup (if required): target boards are positioned at manufacturer-specified distances and heights; the scan tool runs the calibration sequence and logs the result
- Post-static verification: the scan tool confirms the camera output is within OEM tolerance before the vehicle moves
- Dynamic road drive (if required): the technician drives the vehicle at specified speeds on a road with clear lane markings; the scan tool monitors and logs the camera’s real-world performance
- Post-calibration scan: a second full diagnostic scan confirms all ADAS fault codes are cleared and no new codes have been set
- Documentation: the shop provides printed or digital pre- and post-scan reports; these are your proof of completed calibration
After you get the vehicle back, do a short, deliberate check. Drive on a road with clear lane markings and confirm the lane-keeping assist activates normally. Verify the adaptive cruise control engages and tracks a vehicle ahead. Check that no ADAS warning lights appear on the dashboard. Shops should provide pre- and post-scan reports as standard documentation — if yours does not offer them, ask before leaving.
What happens if you skip calibration?
The most dangerous outcome of skipping calibration is not a warning light. It is a system that appears to work normally but operates outside OEM tolerances. AEB may still activate, but later than it should. Lane-keeping assist may still nudge the wheel, but toward the wrong reference point. The driver has no way to know this from inside the vehicle.
A very small camera misalignment can significantly reduce automatic emergency braking reaction performance. That is a fraction of a degree — less than the variation introduced by transferring a camera bracket to new glass without recalibrating.
There is also a liability dimension. If an accident occurs after a windshield replacement and calibration was skipped, an insurer or opposing attorney can establish that the vehicle owner knew — or should have known — that the ADAS system required recalibration. That creates a documentation gap that is difficult to close after the fact. Prioritize immediate calibration if you have had a post-accident windshield replacement, if ADAS warning lights appeared after glass work, or if your vehicle runs a highly automated suite like Subaru EyeSight or BMW Driving Assistance Pro. For a deeper look at the consequences, what happens if ADAS is not calibrated covers the failure modes in detail.
Troubleshooting when calibration doesn’t work the first time
Calibration failures happen, and they almost always have a fixable root cause. The most common ones:
- Aftermarket glass optical distortion: the glass bends the camera’s line of sight differently than OEM glass; when calibration repeatedly fails, shops sometimes replace aftermarket glass with OEM glass to complete the procedure
- Incorrect target placement: even a few centimeters off the specified distance or height causes the calibration sequence to reject
- Wrong bracket position or incomplete adhesive cure: if the bracket has shifted or the urethane has not fully set, the camera’s mount geometry is unstable
- Outdated scan tool software: OEM calibration routines update regularly; a shop running old software may fail on newer model years
- Poor dynamic road conditions: low light, faded lane markings, or heavy traffic cause dynamic calibration to time out
Troubleshooting checklist for the shop:
- Re-measure and re-position the target rig against the OEM specification sheet
- Confirm the glass is OEM or verified OEM-compatible for that VIN
- Update the scan tool software to the current release
- Inspect bracket bonding and confirm full adhesive cure before re-attempting
- For dynamic failures, reschedule the road drive for better conditions (clear daylight, open road, fresh lane markings)
Pro Tip: For dynamic calibration, a straight highway on-ramp with fresh paint and minimal traffic is often more reliable than a busy surface street. If the shop’s default route keeps failing, ask whether a different road is an option — the conditions matter as much as the equipment.
If a shop has attempted calibration twice and cannot complete it, ask them to document the failure codes and request OEM glass before the third attempt. Comparing OEM vs. aftermarket windshield options is worth doing before the replacement if your vehicle has a history of calibration sensitivity.
What a reputable in-house calibration process looks like
A shop that handles ADAS calibration correctly follows a documented chain of custody from the moment the vehicle arrives. Here is what that workflow looks like in practice:
- Step 1 — VIN lookup: the technician pulls the OEM repair procedure for the exact VIN before ordering glass or scheduling the appointment, confirming whether static, dynamic, or dual calibration is required
- Step 2 — Pre-scan: a full diagnostic scan is run and printed; all existing fault codes are documented so nothing is attributed to the calibration work incorrectly
- Step 3 — Glass installation: OEM or verified OEM-compatible glass is installed with the correct urethane adhesive; the camera bracket is seated and bonded per manufacturer spec
- Step 4 — Adhesive cure time: the vehicle waits the manufacturer-specified cure period before any calibration begins — rushing this step is a common shortcut that causes bracket shift
- Step 5 — Static calibration: target boards are set up per the OEM specification sheet; the scan tool runs the calibration sequence and logs a pass/fail result with timestamp
- Step 6 — Dynamic verification (where required): the technician drives the specified route; the scan tool logs the road verification result as a second report
- Step 7 — Post-scan and documentation: a final diagnostic scan confirms all codes are cleared; the shop produces a two-part report (static + dynamic where applicable) for the customer and insurer
Pro Tip: In-house calibration keeps the entire job under one roof and one liability umbrella. When a shop subcontracts calibration to a third party, the chain of custody breaks — and if something goes wrong, the question of who is responsible becomes genuinely complicated. Ask upfront whether calibration is done in-house or sent out.
A note from the technician’s side
One question comes up constantly: “Why do you need my VIN just to give me a price?” The VIN determines the calibration method, the target hardware required, and the software version the scan tool needs. Without it, any quote is a guess.
Another common point of confusion: a mobile install does not always mean same-day calibration is complete. If your vehicle requires static calibration, the glass can be installed at your location, but the calibration itself needs to happen in a shop bay. That is not a limitation of the installer — it is an OEM requirement. The shop will schedule that follow-up appointment before you drive away.
On documentation: every calibration appointment should end with a printed or emailed pre- and post-scan report. Keep it. Your insurer may ask for it, and it is your proof that the work was done to spec.
One practical note on timing: most urethane adhesives require a minimum cure period of one hour before the vehicle can be driven for a dynamic calibration. Some OEM procedures specify longer. The shop will tell you the exact window — do not skip it, because driving on uncured adhesive can shift the bracket and cause the calibration to fail.
Collision Auto Glass & Calibration handles the whole job in-house
Replacing a windshield and then hunting down a separate shop for ADAS calibration is a two-trip problem most vehicle owners did not expect. Collision Auto Glass & Calibration solves it in one appointment. The shop performs in-house ADAS calibration using OEM-approved diagnostic software, with manufacturer-specific target rigs and a level indoor bay — the full setup that static calibration actually requires. Every job ends with a pre- and post-calibration scan report you can hand directly to your insurer.
Same-day mobile installation is available throughout Portland, and for vehicles requiring static calibration, the shop coordinates the follow-up in-house appointment so nothing falls through the gap. Direct insurance billing means the calibration line item gets handled without you playing phone tag between the shop and your carrier. The lifetime no-leak guarantee covers the installation itself.
If you are ready to book or want a VIN-checked quote, schedule your windshield replacement and calibration or get a cost estimate before you call.
Sources
The sources below back the procedures and cost figures in this guide. Each is worth bookmarking if you want to verify OEM-level requirements for your specific vehicle.
John Bean — The Complete Guide to ADAS Calibration: covers why windshield work triggers recalibration and what OEM-level procedures require. Best for understanding the technical basis. Read it here.
AllData — Cracking ADAS: Windshield Replacement: OEM procedure case studies including static vs. dynamic method selection by VIN. Best for shop-level procedure detail. Read it here.
Repairer Driven News — BMW Windshield Replacement Standards (PDF): BMW’s own repair instructions specifying ISTA software and OEM glass requirements. Best for BMW owners and technicians. Read it here.
Colfax Glass — ADAS Windshield Calibration After Replacement: cost ranges, time estimates, and static vs. dynamic method explanations. Best for budgeting. Read it here.
Collision Repair Magazine — ADAS Calibration Failures: quantified data on how small misalignments degrade AEB performance. Best for understanding the safety stakes. Read it here.
- Cracking ADAS: Windshield replacement (ALLDATA)
- ADAS Windshield Calibration After Replacement (2026) | Colfax Glass
FAQ
Do I really need calibration after windshield replacement?
Yes, if your vehicle has a forward-facing camera mounted to the windshield. Nearly all vehicles built after 2019 with ADAS features require recalibration after the glass is removed and replaced.
How long does ADAS recalibration take after windshield replacement?
Static calibration typically takes under two hours in-shop; dynamic calibration requires about half an hour to an hour on the road; dual calibration, combining both, takes a couple of hours in total, depending on the OEM procedure.
Do I need to recalibrate sensors after a windshield replacement?
Yes, for any sensor or camera mounted to the windshield. The camera bracket bonds to the glass, so replacing the glass changes the camera’s mounting geometry and requires a formal OEM recalibration.
How much does it cost to recalibrate after windshield replacement?
Static calibration typically costs $150–$300, dynamic $100–$250, and dual $250–$500. Many comprehensive insurance policies cover calibration as part of a glass claim — confirm with your insurer before the appointment.
Can Collision Auto Glass & Calibration handle both the replacement and calibration?
Yes. Collision Auto Glass & Calibration performs in-house ADAS calibration using OEM-approved software, provides pre- and post-scan reports, and handles direct insurance billing, so the entire job is completed under one roof.
Recommended
- Need a New Windshield? Don’t Forget Calibration – Collision Auto Glass & Calibration
- Do I Need To Recalibrate My ADAS If I Replace My Windshield? – Collision Auto Glass & Calibration
- Why You Shouldn’t Delay Getting Windshield Repair or Replacement – Collision Auto Glass & Calibration
- How to Properly Care for a New Windshield – Collision Auto Glass & Calibration
🎧 Listen to This Article
Share
Recent Posts
October 20, 2026
EV Windshield Replacement: Glass, Calibration and Cost
Replacing an EV windshield involves camera calibration, the right glass and proper adhesive. Here is what to ask, what it costs and how...

October 19, 2026
How to Choose a Fleet Auto Glass Vendor in 2026
Choosing a fleet auto glass vendor? Compare ADAS calibration, mobile service, billing, records and warranty, with a scorecard and questions to ask....
October 18, 2026
Side Window Replacement Process: What Happens, Step by Step
How a professional side window replacement works, from glass type and cleanup to install and cure time, plus Oregon insurance and tint rules....