Auto Glass Repair
TL;DR:
- Windshield pitting results from micro-impacts by debris, impairing vision through glare and halos. Repair depends on pitting depth and coverage, with polishing suitable for shallow damage and full replacement needed for extensive pits. Early inspection and professional assessment prevent costly repairs and ensure safe driving.
Windshield pitting repair is defined as the process of reducing or eliminating microscopic surface craters in automotive glass to restore optical clarity and driving safety. These craters form over time as sand, gravel, and road debris strike the glass at highway speeds. About 50% of vehicles with windshield damage have chips or pits that drivers do not notice until visibility problems appear. Collision Auto Glass & Calibration has assessed hundreds of pitted windshields across Portland, and the single most important decision is always the same: determine whether polishing can restore the glass or whether full replacement is the only safe path forward.
What causes windshield pitting and how do you identify it?
Windshield pitting results from cumulative micro-impacts by sand, grit, and small debris thrown up by other vehicles. Unlike a chip, which is a single point of impact, pitting consists of thousands of microscopic craters spread across the glass surface. That distinction matters because resin filling, the standard fix for chips, is completely impractical for pitting. You cannot fill thousands of individual craters with resin.
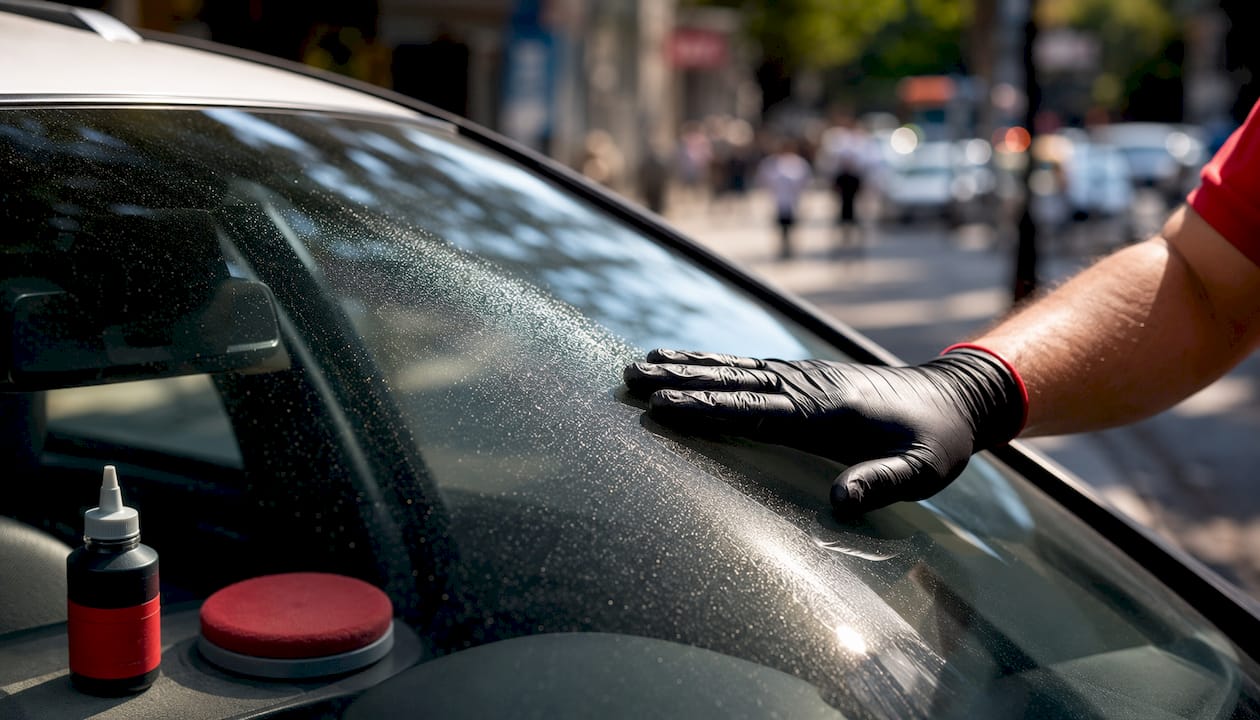
The primary safety risk from pitting is not structural failure. It is light scattering. Pitting causes glare and halo effects that significantly impair vision at night or when driving into direct sunlight. Portland drivers who commute westbound in the late afternoon know exactly how blinding low-angle sun can be. A pitted windshield makes that experience dramatically worse.
Identifying pitting early protects you from bigger repair bills later. Watch for these signs:
- A general haziness or milky appearance across the glass surface, most visible in bright light
- Glare or starburst patterns around oncoming headlights at night
- A rough or gritty texture when you run a clean fingertip across the outer glass surface
- Reduced clarity that worsens progressively rather than appearing suddenly as a chip would
- Difficulty seeing clearly during rain, even with wipers running at full speed
The fingernail test is the fastest field check. Run your fingernail lightly across the outer glass surface. Shallow pitting feels slightly rough but your nail glides over it. If your nail catches or drags noticeably, the pits are deep enough that polishing alone will not fix them.
How to prepare and assess your windshield before repair
Proper preparation determines whether a repair attempt succeeds or wastes your time. A dirty or wet surface hides the true extent of pitting and prevents polishing compounds from working correctly.
Follow these steps before any repair attempt:
- Wash the entire windshield with a dedicated automotive glass cleaner and a clean microfiber cloth. Avoid household glass sprays that leave silicone residue.
- Rinse thoroughly and dry with a second clean microfiber cloth. Any water streaks will interfere with your inspection.
- Park the vehicle so sunlight hits the windshield at a low angle, ideally in the early morning or late afternoon. This raking light reveals pitting far more clearly than overhead light.
- Inspect the glass in sections, moving your eye position to catch reflections from different angles.
- Perform the fingernail test across each section to map which areas have shallow pitting versus deep pitting.
The table below summarizes what your inspection results mean for your repair options.
| Inspection finding | Recommended action |
|---|---|
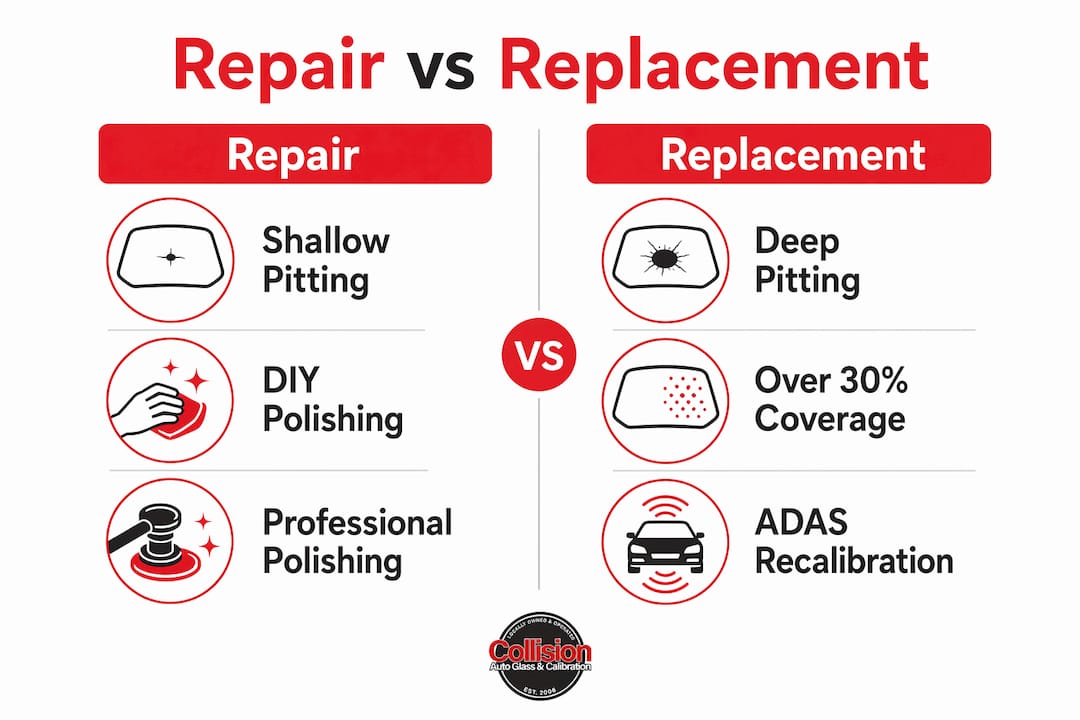
| Slight roughness, nail glides over surface | DIY polishing with cerium oxide may reduce pitting |
| Nail catches occasionally, limited area | Professional polishing recommended |
| Nail catches consistently, widespread | Replacement strongly advised |
| Pitting covers more than 30% of glass | Replacement required |
Pro Tip: Inspect your windshield at night by shining a flashlight across the surface at a low angle from inside the car. This reveals pitting patterns that daylight inspection misses entirely.
Cerium oxide is the polishing compound most commonly used for glass restoration. It is a mild abrasive that removes a very thin layer of glass to smooth shallow pits. You will also need a variable-speed drill or polisher, a felt polishing pad, and a spray bottle of water to keep the compound wet during application.
What repair methods actually work for pitted glass?
Repair options fall into two categories: DIY polishing and professional polishing. The right choice depends entirely on the depth and coverage of the pitting your inspection revealed.
DIY polishing with cerium oxide
For mild, shallow pitting, cerium oxide polishing is a legitimate first step. Follow this process carefully:
- Mix cerium oxide powder with water to form a paste roughly the consistency of toothpaste.
- Apply a small amount to a damp felt polishing pad attached to a variable-speed drill.
- Work in small sections of about 6 inches by 6 inches. Keep the pad moving at all times and never let it stop in one spot.
- Use low to medium speed. High speed generates heat that can stress the glass.
- Keep the surface wet throughout. Dry polishing causes optical distortion.
- Wipe away residue with a clean microfiber cloth and inspect the section before moving on.
- Repeat passes as needed, but stop if you see any rainbow shimmering or waviness in the glass.
Pro Tip: Limit each polishing session to two or three passes per section. Overuse of polishing removes too much glass and creates optical distortion that is worse than the original pitting.
Why DIY kits designed for chips fall short
DIY resin repair kits designed for single chip repairs provide no benefit for widespread pitting and can trap resin in the craters, causing permanent cloudiness. These kits are engineered for one isolated impact point, not thousands of microscopic craters. Using them on a pitted windshield is a common and costly mistake. For a detailed breakdown of why consumer kits underperform, the analysis on DIY windshield repair risks explains the limitations clearly.
Professional polishing
Professional technicians use diamond paste compounds and graduated grit polishing systems that are not available to consumers. This graduated approach carefully removes glass in controlled increments, restoring clarity without compromising structural integrity. The result is significantly better than what a consumer drill and cerium oxide can achieve. Professional polishing is the right call for moderate pitting where the nail test shows occasional catching but coverage is below 30% of the glass area. Even professional polishing is a temporary solution for moderate damage. It reduces the problem but does not eliminate the underlying glass loss.
When does windshield pitting require full replacement?
Replacement is the only safe answer when pitting crosses specific thresholds. Polishing cannot restore visibility or structural integrity beyond those points.
Replacement is advised when pitting covers more than 30% of the windshield surface or when pit depth compromises the glass structure. At that scale, polishing removes too much material and creates distortion rather than clarity. The fingernail test result is equally definitive: pits that consistently catch a fingernail are too deep to polish away effectively.
Untreated pitting also creates a structural risk over time. Pits become nucleation points for stress cracks if left unaddressed. A stress crack that spreads across the glass costs far more to address than early-stage pitting.
Windshield replacement restores full structural integrity and optical clarity in a single step. For drivers whose pitting has reached the replacement threshold, no amount of polishing closes that gap safely.
Replacement costs typically range from $250 to $600 depending on vehicle type, glass quality, and whether ADAS recalibration is required. That range reflects a significant spread, and the reason is ADAS. Vehicles equipped with forward-facing cameras, lane-keeping systems, or automatic emergency braking require ADAS recalibration after any windshield replacement. Skipping calibration after replacement leaves those safety systems operating on incorrect reference points. For a full breakdown of what replacement costs in the Portland area, the windshield replacement cost guide covers vehicle-specific pricing in detail.
| Condition | Recommended action | Estimated cost |
|---|---|---|
| Shallow pitting, nail glides, under 10% coverage | DIY cerium oxide polishing | Minimal, under $30 in materials |
| Moderate pitting, occasional nail catch, under 30% | Professional polishing | Varies by shop |
| Deep pitting, nail catches consistently | Full replacement | $250–$600 depending on vehicle and ADAS needs |
| Pitting over 30% of glass surface | Full replacement required | $250–$600 depending on vehicle and ADAS needs |
Always choose a certified technician who follows Auto Glass Safety Council standards for replacement. Proper urethane adhesive application and cure time are non-negotiable for structural safety.
How to prevent further windshield damage after repair
Prevention extends the life of a repaired or replaced windshield significantly. Portland’s mix of highway driving on I-205 and I-84, plus frequent rain and road debris, makes proactive care especially worthwhile.
- Maintain at least a three-second following distance behind trucks and vehicles carrying loose loads. Gravel trucks are the single biggest source of pitting damage on Oregon highways.
- Avoid unpaved or gravel roads when possible. Sand pitting windshield damage accelerates dramatically on unsealed surfaces.
- Clean your windshield regularly with a dedicated automotive glass cleaner. Abrasive dirt left on the surface gets dragged across the glass by wiper blades, deepening existing pits.
- Replace worn wiper blades at least once a year. Degraded rubber leaves streaks and can scratch the glass surface directly.
- Never dry-wipe a dusty windshield. Always wet the surface first to lift grit before wiping.
- Apply a hydrophobic glass sealant such as Rain-X after cleaning. These products fill minor surface irregularities and reduce the friction that debris causes on impact.
- Address rock chips immediately. A chip left unrepaired becomes a crack, and a crack that reaches a pit creates a larger structural problem. Early chip repair costs a fraction of replacement.
- Schedule a professional windshield inspection annually. A technician can track pitting progression and tell you when you are approaching the replacement threshold before visibility becomes a safety issue.
Understanding auto repair estimates before any service appointment also helps you evaluate whether a quoted repair or replacement price is fair for your vehicle type.
Key Takeaways
Windshield pitting repair is effective for shallow, limited damage, but pitting that covers more than 30% of the glass or catches a fingernail requires full replacement to restore safety.
| Point | Details |
|---|---|
| Pitting differs from chips | Pitting is thousands of microscopic craters; resin chip kits cannot fix it. |
| Light scattering is the core risk | Pitting causes glare and halos that impair night and sun-glare driving. |
| Fingernail test guides decisions | Pits that catch a fingernail consistently require replacement, not polishing. |
| 30% coverage is the replacement threshold | Polishing above this coverage level removes too much glass and causes distortion. |
| ADAS recalibration is mandatory after replacement | Vehicles with driver-assistance cameras require recalibration for safety systems to function correctly. |
What we see every week at Collision Auto Glass & Calibration
The most common mistake we see is a driver who waited. They noticed the haze six months ago, assumed it was just road grime, and kept driving. By the time they bring the car in, the pitting has spread well past the 30% threshold and polishing is off the table entirely. A replacement that could have been avoided with earlier intervention is now the only option.
The second most common mistake is the DIY chip kit. Drivers buy a consumer resin kit thinking it will fill the pits. It does not. It traps resin in the craters and creates a cloudy patch that is harder to address than the original pitting. We have seen windshields where a well-intentioned repair attempt made the glass worse than leaving it alone would have.
Our honest assessment after years of working on Portland windshields: professional evaluation costs nothing compared to the cost of getting this wrong. Bring the car in, let a technician run the fingernail test across the full glass surface, and get a clear answer. If polishing will work, we will tell you. If it will not, we will tell you that too. There is no value in recommending a repair that will not hold. Checking for common misconceptions about auto glass repair before you decide on a course of action is also worth your time.
— Collision Auto Glass & Calibration
Collision Auto Glass & Calibration’s windshield services in Portland
Portland drivers dealing with pitting, chips, or cracks can get a clear answer without guesswork. Collision Auto Glass & Calibration provides thorough windshield inspections, professional polishing for repairable pitting, and full replacement using OEM-quality glass when the damage crosses the threshold.
Every replacement includes in-house ADAS calibration, a lifetime no-leak guarantee, and direct insurance billing so the process stays simple. Same-day service and free mobile installation are available throughout the Portland area. For a full overview of what each service covers, visit the auto glass service guide or request a quote directly at collisionautoglass.com. The team has served Portland drivers since 2008 and will give you a straight answer on whether your windshield needs repair or replacement.
FAQ
What is windshield pitting and how does it differ from a chip?
Windshield pitting is a pattern of thousands of microscopic surface craters caused by cumulative sand and debris impact. A chip is a single point of impact that resin can fill; pitting cannot be repaired with resin.
Can I repair pitted windshield damage myself?
Mild, shallow pitting can be reduced with cerium oxide polishing using a felt pad and variable-speed drill. Deep pitting or coverage above 30% of the glass surface requires professional assessment and likely full replacement.
How do I know if my windshield needs replacement instead of repair?
Run your fingernail across the outer glass surface. Pits that catch a fingernail consistently are too deep to polish away and indicate replacement is necessary.
Does insurance cover windshield pitting repair or replacement?
Comprehensive auto insurance typically covers windshield replacement, often with no deductible for repair. Contact your insurer directly to confirm coverage terms for your policy before scheduling service.
Does windshield replacement require ADAS recalibration?
Yes, vehicles equipped with forward-facing cameras or driver-assistance systems require ADAS recalibration after any windshield replacement. Skipping this step leaves safety systems operating on incorrect reference data.
Recommended
- 5 Tips on Choosing the Best Auto Glass Shop to Fix Your Windshield
- Frequently Asked Questions About Auto Glass Replacement & Repair
- Common Misconceptions about Auto Glass Repair – Collision Auto Glass & Calibration
- Why You Shouldn’t Delay Getting Windshield Repair or Replacement – Collision Auto Glass & Calibration
Share
Recent Posts
July 21, 2026
Car Window Smashed in Portland: What to Do Now
If your car window smashed in Portland, act quickly. Learn essential steps to stay safe, document damage, and file a police report....

July 20, 2026
Windshield Pitting Repair: When to Fix or Replace
Discover the essentials of windshield pitting repair. Learn when to fix or replace your windshield to maintain safety and clarity while driving....

July 20, 2026
Blind Spot Calibration: A Complete Guide for Drivers
Ensure your safety on the road with blind spot calibration. Learn how to align your vehicle’s sensors for accurate detection and avoid accidents....