
Auto Glass Repair
If your windshield leaks after replacement, stop driving in heavy rain, dry the cabin, and document everything before you touch a tube of sealant. Snap photos of the wet spots, save your invoice, and note exactly when and where the water shows up. Then decide: run a low-pressure water test to pinpoint the source, or apply a temporary automotive urethane sealant if you need a short-term stopgap.
- Contain and photograph the leak immediately.
- Locate the source with a water test before you fix anything.
- Call the installer if the leak traces back to the glass bond.
- Keep your receipts, part numbers, and time-stamped photos in one folder.
- A workmanship issue with a reputable shop like Collision Auto Glass & Calibration, a member of the Auto Glass Safety Council (AGSC), typically falls under warranty. If ADAS calibration was part of your original job, factor that into any reinstall plan too.
Key Takeaways
Most post-replacement windshield leaks trace back to either an uneven urethane bead or an unrelated clogged drain, and the ordered water test tells you which one you’re facing.
| Point | Details |
|---|---|
| Document before you fix | Photograph wet spots, save your invoice, and note which water-test stage produced moisture. |
| Test before you guess | Run the hose test in order, roof, cowl, glass, doors, to find the real source. |
| Know your DIY limits | Small sealant gaps can be resealed with automotive urethane; corrosion or bond failure needs a pro. |
| Respect cure time | Wait roughly 48 hours before testing a fresh replacement to avoid a false result. |
| Choose a shop with a real guarantee | Collision Auto Glass & Calibration offers a lifetime no-leak guarantee and same-day mobile re-bonds if a bond fails. |
Table of Contents
- Checklist for the First 30 to 60 Minutes After You Spot a Leak
- How to Confirm the Leak and Locate the Exact Entry Point
- Most Common Causes When a New or Replaced Windshield Leaks
- Safe DIY Fixes You Can Try: Temporary Containment and Reseal Methods
- When to Demand the Installer Fix It
- What Professionals Do to Fix Windshield Leaks (and What It Costs)
- Urethane Cure Times and What Not to Do After a Replacement
- Troubleshooting Checklist and Red Flags That Mean Call a Pro Now
- Expert Technician Tips: What Glass Techs Check First
- Why Prompt, Documented Action Matters
- If You Want a Dependable Fix: What a Recommended Local Specialist Provides
- Sources
- FAQ
Checklist for the First 30 to 60 Minutes After You Spot a Leak
Grab towels first, not tools. Soak up standing water, lay plastic sheeting over exposed upholstery, and set a bowl under any steady drip so it stops spreading across your carpet or seat foam.
Next, build your paper trail. You’ll need this whether you’re pursuing a warranty claim or a DIY fix.
- Photograph every wet spot, including the headliner, A-pillar, and footwell carpet.
- Record a short video of water actively entering the cabin, with a visible timestamp.
- Copy the serial number and part number from your invoice, along with the installer’s name and contact info.
- Unplug or cover nearby electronics (infotainment units, fuse panels under the dash) until the area dries.
- Note any musty or moldy smell. That’s often the first sign water has been sitting longer than you realized.
Pro Tip: Take one photo holding a ruler or coin next to the wet area. It gives you a scale reference that makes the damage far more convincing if you’re arguing for a no-cost warranty fix later.
How to Confirm the Leak and Locate the Exact Entry Point
You can’t fix what you haven’t located, and guessing wrong wastes time and sealant. Two tests, done in the right order, will tell you almost everything you need to know.
The low-pressure water test. This is the standard diagnostic method shops and technicians rely on, and you can replicate it in your driveway with a garden hose set to a gentle stream, never a pressure washer.
- Have a second person sit inside the car with a flashlight while you work outside.
- Wet the roof first for two to three minutes and check for any drip inside.
- Move to the cowl area at the base of the windshield next, since clogged cowl drains are a frequent culprit that has nothing to do with the glass itself.
- Run water along the bottom edge of the windshield, then work upward along both A-pillars.
- Finally, test the doors and sunroof separately so you don’t mix results.
This staged approach matters because water rarely drips straight down from where it enters. It travels along seams, wiring harnesses, and headliner fabric before it shows up as a stain, which is exactly why a systematic, ordered hose test beats randomly spraying the whole car at once.
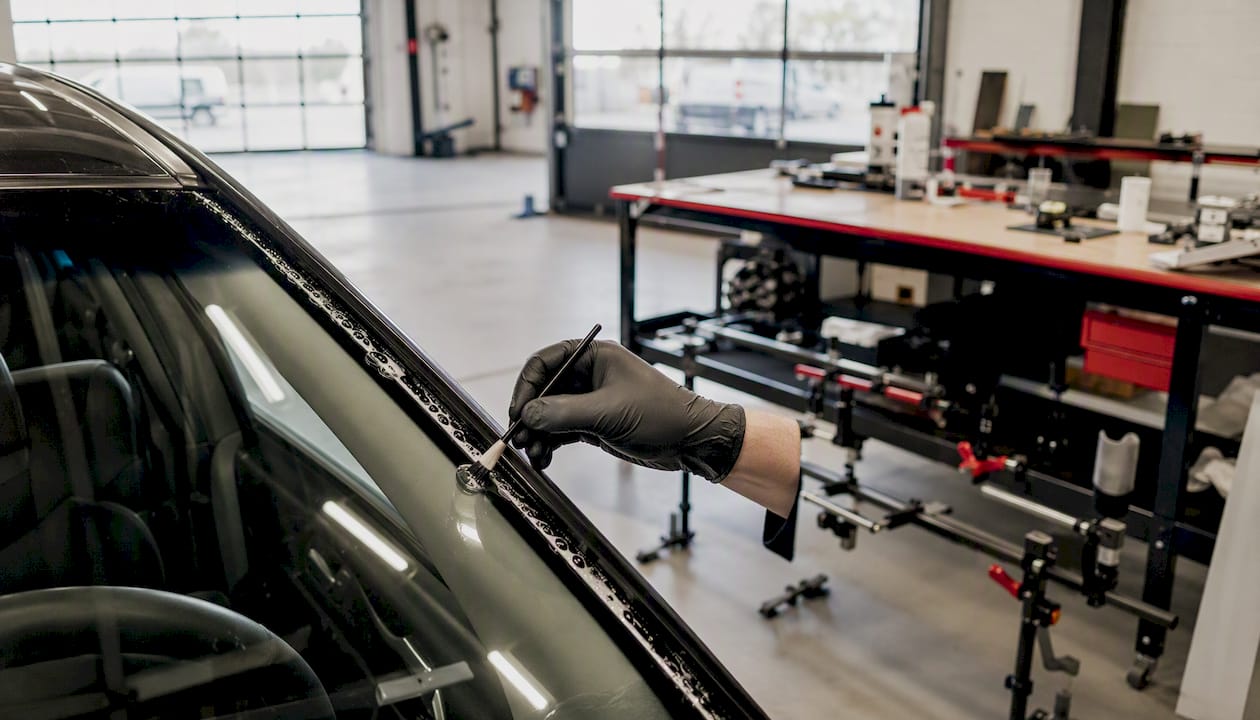
The soap-bubble method. For a small, hard-to-find gap, mix a few drops of dish detergent into water, spread a thin film along the windshield molding, and turn your defroster on high with the windows up. Air escaping through a gap in the urethane bead will push the soap film into small, growing bubbles. It’s slower than the hose test but excellent for confirming a specific suspect spot.
One important safety note: never use a pressure washer for either test. The force can push water past a barely-failing seal that would otherwise hold up fine in normal rain, giving you a false positive.
Where the water shows up tells you a lot. Water tracing down the A-pillar during the windshield-glass stage points to the urethane bond. Water pooling near your feet during the cowl stage usually means a clogged drain, not a bad installation.
Most Common Causes When a New or Replaced Windshield Leaks
Installation problems account for a large share of post-replacement leaks, but they’re not the only explanation. Sorting out which category you’re dealing with changes your entire next move.
Installation-related causes:
- An uneven or interrupted urethane bead, where a small gap in the adhesive line leaves a direct path for water.
- Contaminated pinch weld surfaces, meaning dirt, oil, or old adhesive residue prevented a clean bond.
- Skipped surface prep, such as failing to properly prime bare metal before applying new urethane.
- Missing or improperly reinstalled moldings and trim pieces that were supposed to shield the seal edge.
Vehicle system causes that mimic a windshield leak:
- Clogged cowl drains that back up rainwater until it overflows into the cabin.
- Blocked sunroof drain tubes, which can dump water near the headliner even on cars without an obvious sunroof leak history.
- A blocked AC evaporator drain, which shows up as water pooling near the passenger footwell, often after the AC has been running.
- Torn or displaced door vapor barriers, letting water track down door panels and pool at the bottom.
The presence of wind noise at highway speed, or a visible rust-colored stain trailing along the A-pillar, usually points to a genuine glass-bond failure rather than a drain or HVAC issue. Diagnosing correctly the first time saves you from paying for a re-bond you didn’t actually need.
Safe DIY Fixes You Can Try: Temporary Containment and Reseal Methods
Not every leak requires a shop visit. If your water test shows a small, localized gap in the urethane rather than a torn bond or corroded frame, a careful DIY reseal can genuinely solve the problem.
What you’ll need:
- Automotive-grade urethane sealant or a glass-specific reseal kit
- Plastic trim removal tools
- Rubbing alcohol and lint-free towels for surface prep
- Painter’s tape to mask the area
What to avoid entirely: household silicone caulk and super glue. Neither one flexes or bonds the way automotive urethane does, and using them can actually make a future professional repair harder because the shop has to strip out the wrong material first. Industry trainers specifically warn against household silicones and superglues for exactly this reason, pointing installers toward glass-specific products instead.
Reseal steps:
- Clean and fully dry the joint where the leak was confirmed. Any residual moisture will trap itself under the new sealant.
- Carefully remove the molding or trim covering that section, using a plastic tool to avoid scratching paint.
- Apply the automotive urethane directly into the joint, not as a cosmetic bead across the visible trim line.
- Reinstall the trim and let the sealant cure for the time listed on the product, usually 24 to 48 hours.
- Retest with the same water test sequence before declaring it fixed.
A properly done DIY reseal can stop many minor leaks caused by simple sealant failure. But if your water test reveals hidden corrosion at the pinch weld, or the urethane bead has failed continuously along a long stretch rather than one small gap, resealing is only a stopgap. The glass will need to come off, the metal treated, and the bond redone properly.
Pro Tip: If you’re not confident removing trim without cracking it, skip that step and apply sealant along the exposed edge only. A slightly less clean repair beats a broken molding clip you now have to source and replace.
When to Demand the Installer Fix It
A workmanship warranty on a windshield installation typically covers water intrusion, and most reputable shops want you to report it fast. Waiting too long makes the eventual fix messier and gives a shop room to argue the leak developed for unrelated reasons.
What counts as a warranty issue:
- Water entering specifically during the windshield-glass stage of your test, not the cowl or door stage.
- A bond that looks uneven, thin, or gapped when you inspect it closely.
- A leak that appeared within days or weeks of the original replacement.
What to bring to the shop:
- Your dated invoice with the part and serial numbers.
- Photos and video from your water test, labeled by which stage produced water.
- A specific, direct request: a no-cost re-bond or reinstallation, not just “can you take a look.”
A sample script that works: “My windshield was replaced on [date], and I’m seeing water enter during the glass-stage of a hose test I ran myself. I’d like this inspected and reinstalled under your workmanship warranty.” Most installers will schedule this promptly, since early corrections are far easier for them than a leak that’s had months to cause hidden damage. If a shop refuses to honor a clear installation failure, escalate to a manager or, for insurance-billed jobs, loop in your claims adjuster.
What Professionals Do to Fix Windshield Leaks (and What It Costs)
A proper professional repair starts with removing the trim and inspecting the pinch weld for rust or old adhesive buildup. If the metal underneath looks clean, the technician cuts out the old glass, preps the surface, and applies a fresh, continuous bead of OEM-grade urethane before setting the new glass and retesting.
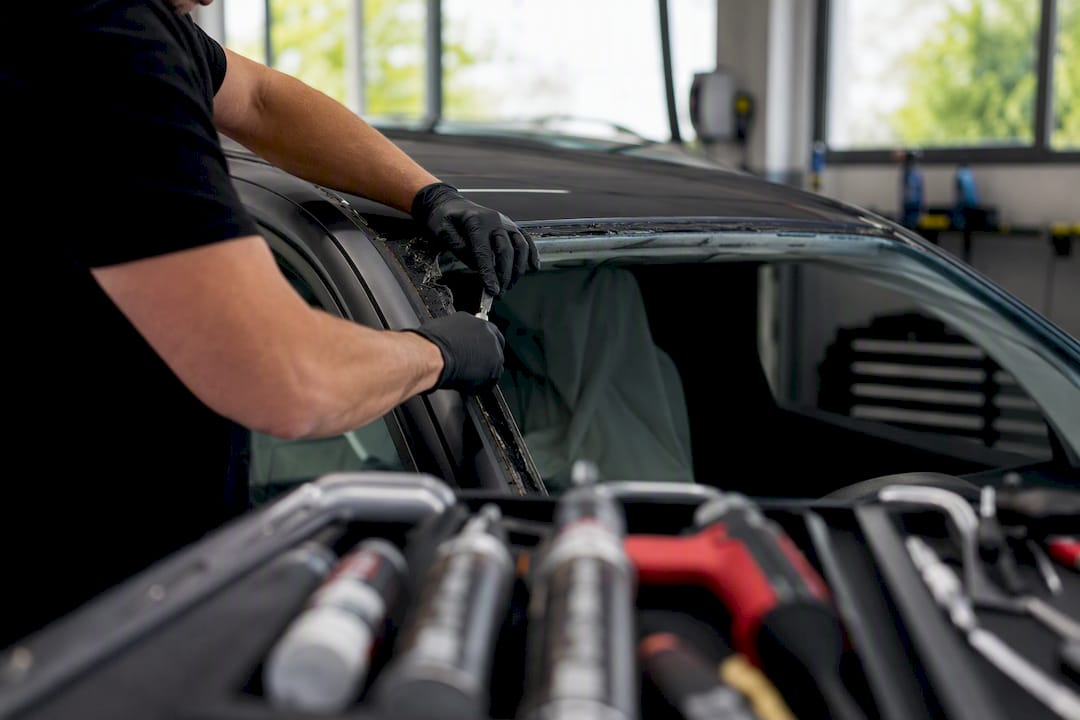
When frame or body repair becomes necessary: visible corrosion in the bond area, or a pinch weld that’s warped from a prior collision, forces additional metal prep before any new adhesive can hold. Skipping this step is exactly how leaks recur after a “fixed” windshield.
Cost guidance you can use for budgeting:
- A local professional reseal of a minor gap typically runs on the lower end of a basic auto glass service call.
- A full re-bond or reinstallation costs more, since it involves removing and resetting the entire windshield.
- Frame or pinch weld corrosion repair adds the most, because it requires bodywork before glass work can even begin.
If your original replacement included ADAS camera calibration, a re-bond typically requires that calibration to be redone afterward, since shifting the glass even slightly changes the camera’s reference point. This is one reason a lifetime workmanship guarantee matters when you’re choosing a shop in the first place. It means the re-bond, and any required recalibration, comes at no extra charge if their original work failed.
Urethane Cure Times and What Not to Do After a Replacement
Most automotive urethane reaches a safe initial set within an hour or two, but full structural cure, the point where the bond can handle real stress, often takes closer to 24 to 48 hours depending on the product and weather. That’s why the ideal window for your first water test is after that cure period, not immediately following installation.
During the cure window:
- Skip the car wash and avoid parking under sprinklers or in heavy rain if you can help it.
- Don’t slam doors. The pressure change can stress a bond that hasn’t fully set.
- Avoid rough roads and speed bumps when possible.
- Never use a pressure washer near the glass edge, even after the cure period.
If you tested too early and found a leak, note the exact hours since replacement and ask the shop to re-evaluate. A bond that hasn’t fully cured is sometimes easier to correct than one that’s already set.
Troubleshooting Checklist and Red Flags That Mean Call a Pro Now
Some signs mean you should skip DIY entirely and get a professional re-bond scheduled immediately.
- Heavy pooling inside the cabin rather than a slow drip.
- Any electrical or infotainment fault appearing after water exposure.
- Visible rust forming along the bond line.
- A leak that returns after you’ve already tried a DIY reseal.
- New wind noise at highway speed that wasn’t there before the replacement, or a visible gap under the trim.
Repeating the same quick DIY fix over and over usually just masks a failure that needs a proper re-bond. Document it, then schedule the professional visit rather than trying a fourth tube of sealant.
Expert Technician Tips: What Glass Techs Check First
Technicians run through a specific checklist before they ever touch new urethane: pinch weld prep and cleanliness, continuity of the old bead (any thin spots or gaps), molding fit, and a fresh low-pressure water test once the repair is done, not just once at drop-off.
- Confirm the pinch weld is rust-free and properly primed before any adhesive goes down.
- Check that the urethane bead has no visible breaks along its full perimeter.
- Verify moldings seat flush, since a lifted molding edge is a common hidden entry point.
- Retest with water after the repair, not just visually inspect it.
If your vehicle needs ADAS recalibration, that’s a distinct safety step usually performed after the re-bond, not during it. Shops that offer a documented lifetime no-leak guarantee, same-day mobile service, and in-house calibration, like Collision Auto Glass & Calibration, build those steps into the process instead of treating them as optional add-ons.
Pro Tip: Ask any shop directly whether their water retest happens before or after you drive off. A shop confident in its work will test on-site, not leave that step to you.
Why Prompt, Documented Action Matters
Delay is what turns a fifteen-minute fix into a real headache. Water sitting inside door panels or under carpet for even a few days invites mold, and moisture that reaches wiring harnesses or module connectors can cause electrical faults that show up weeks later, long after anyone remembers a windshield leak was the cause. Rust starts fast, too. A pinch weld that could have been cleaned and re-bonded on day three can develop corrosion by week three, turning a warranty reseal into a body repair.
The fix isn’t complicated. Document the leak the day you find it, run the water test before you touch a sealant tube, and contact your installer within the first few days rather than waiting to see if it “dries out on its own.” It rarely does.
If You Want a Dependable Fix: What a Recommended Local Specialist Provides
A DIY reseal or a return trip to a shop that won’t stand behind its own work both leave you guessing. Collision Auto Glass & Calibration backs every windshield installation with a lifetime no-leak guarantee, so if a bond ever fails, the re-bond or reinstallation costs you nothing.
Same-day mobile service means a technician can come to you within the Portland area rather than you driving around with a leak. Every job includes documented before-and-after testing, direct insurance billing so you’re not stuck fighting paperwork, and in-house ADAS calibration whenever a replacement requires it. If you’re dealing with a leak right now, gather your original invoice, your water-test notes, and your photos, then get a windshield replacement quote and have a technician take it from there.
Sources
- Windshield Seal Repair Tips | Progressive
FAQ
Can a Leaking Windshield Be Resealed?
Yes, when the cause is a small gap or worn spot in the urethane rather than glass damage or a corroded pinch weld. If your water test points to a localized bond issue, a properly applied automotive-grade sealant often solves it without a full reinstallation.
What Should I Avoid Doing After a Windshield Replacement?
Avoid car washes, pressure washers, slamming doors, and rough roads during the first 24 to 48 hours while the urethane fully cures. Skip household silicone or super glue if you’re tempted to try a quick fix yourself.
How Long Does It Take for a Windshield to Dry After Being Replaced?
The urethane typically reaches a safe initial set within one to two hours, but full structural cure often takes 24 to 48 hours. Wait for that full cure window before running a water test for the most reliable result.
Why Does My Windshield Leak After Heavy Rain?
Heavy rain applies more sustained pressure and volume than a light shower, which exposes small gaps in the urethane bead or clogged cowl and sunroof drains that a light rain might not reveal. If the leak only shows up during downpours, run the staged water test to confirm whether it’s the glass bond or a drainage issue.
Is a Windshield Leak Usually Covered Under Warranty?
Most reputable installers, including Collision Auto Glass & Calibration with its lifetime no-leak guarantee, cover water intrusion caused by a failed bond at no cost to you. Report it promptly with photos and water-test notes so the shop can schedule a re-bond before the issue worsens.
Recommended
- Windshield Pitting Repair: When to Fix or Replace
- How to Properly Care for a New Windshield – Collision Auto Glass & Calibration
- 5 Tips on Choosing the Best Auto Glass Shop to Fix Your Windshield
- 7 Signs Your Windshield Needs Repair Before It Spreads – Collision Auto Glass & Calibration
🎧 Listen to This Article
Share
Recent Posts

September 22, 2026
Backlite Meaning for Portland Drivers: Same Day Replacement and ADAS
U.S. focused explainer defining backlite, how to spot tempered vs laminated rear glass, when chips require replacement, and what ADAS calibration may need....
September 21, 2026
24–48 Hours: Technician Backed Windshield Tape Rules and Safe Removal
Leave retention tape 24–48 hours (72 in cold or damp). Avoid car washes, warm the tape and peel slowly at a low angle....
September 20, 2026
When Drivers Can Drive After Windshield Urethane: 1–3 Hours, SDAT & Charts
Find exactly when you can drive after windshield urethane. Learn AGRSS SDAT rules, how to read manufacturer cure charts, and simple aftercare. Often...