
Auto Glass Repair
Most scratched side windows show only surface-level damage, and light scratches often improve with careful DIY polishing using cerium oxide. Run your fingernail across the mark first: if it catches instead of gliding, stop and call a professional, since deeper scratches usually need resin repair or replacement. If the scratch sits in the driver’s direct line of sight, treat it as a safety issue and get it inspected before you attempt anything yourself.
TL;DR:
- Shallow scratches that do not catch a fingernail can often be improved with DIY cerium oxide polishing, while deeper scratches require professional repair or replacement.
- Avoid polishing tinted or coated windows yourself, as improper techniques can strip coatings or tint films, especially if their type is uncertain.
- Using household remedies like WD-40, toothpaste, or baking soda only masks scratches temporarily and can cause additional damage or residue if overused.
- Competition between DIY and professional repair hinges on scratch depth; deep or sightline scratches should be evaluated by a technician to prevent safety hazards.
- Proper assessment, preparation, and caution are essential, with professional evaluation recommended for scratches in the driver’s direct view or on interior or coated glass.
Table of Contents
- How to Assess Scratch Type and Severity
- Tools and Materials for DIY Glass Polishing
- How Do You Polish Out a Scratched Side Window Yourself?
- Do WD-40, Toothpaste, and Baking Soda Actually Remove Scratches?
- When Should You Call a Professional Instead of Polishing It Yourself?
- Why a Trained Technician Handles Scratched Glass Differently
- What Most DIY Advice Gets Wrong About Scratched Glass
- Get a Professional Opinion Before the Scratch Gets Worse
- Sources
- FAQ
How to Assess Scratch Type and Severity
The fingernail test is the fastest way to sort a minor cosmetic issue from a real problem. Drag your nail slowly across the mark: if it glides smoothly, you’re likely dealing with a shallow surface scratch that responds well to polishing compound. If your nail catches or snags, the scratch has cut deeper into the glass and DIY polishing probably won’t resolve it.
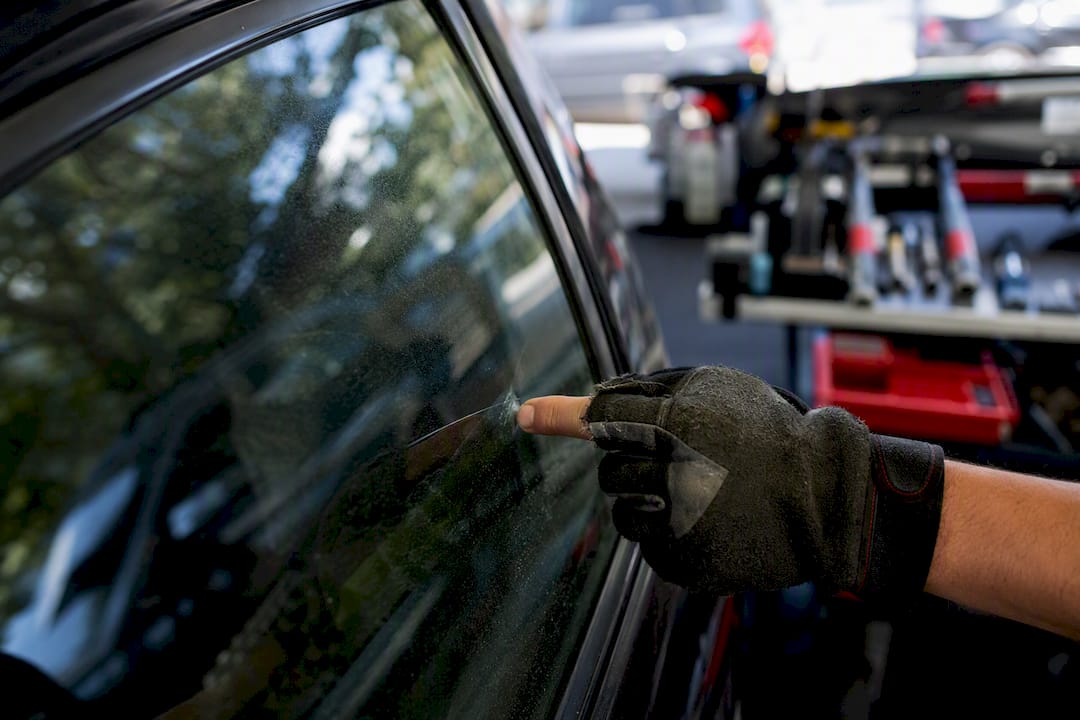
Beyond touch, look at how light behaves around the mark. A shallow scratch usually shows as a thin, consistent line with minimal distortion. Deeper damage tends to scatter reflections or create a slight haze when you view the window at an angle in sunlight.
Glass type matters just as much as depth. Check your owner’s manual or look for etched markings in the corner of the pane; side windows are almost always tempered glass, while windshields are laminated. Tinted or coated windows add another layer of risk since polishing can strip the film. Here’s what to check before you touch a buffer:
- Fingernail glide: shallow, treatable at home
- Fingernail catch: deep, needs professional evaluation
- Visible distortion in reflections: likely moderate to deep damage
- Tint film or coating present: polishing may ruin it
- Scratch in driver sightline: safety and legality concern, get it checked
A scratch directly in your line of sight isn’t just an eyesore. Glare and distortion from a damaged pane can affect visibility at night or in rain, which is worth checking against safe driving standards before you decide whether to drive on it.
Tools and Materials for DIY Glass Polishing
A successful scratch repair depends more on the right materials than brute effort. Cerium oxide is the standard polishing abrasive for glass because it levels scratch edges gradually instead of gouging them deeper the way many general-purpose polishes can.
Gather these before you start:
- Cerium oxide powder mixed into a paste with distilled water
- Felt or wool polishing pads sized to fit a variable-speed drill or handheld buffer
- A glass repair resin kit and a fresh razor blade for deeper gouges
- Microfiber cloths and alcohol-based glass cleaner
- Masking tape and plastic sheeting to protect paint, trim, and rubber seals
- Safety glasses and nitrile gloves
Keep your buffer speed low. High RPM generates heat fast, and heat is the enemy of clear glass. Rinse and inspect the area every couple of minutes rather than grinding continuously in one pass.
Pro Tip: Test your cerium oxide paste on a hidden section of glass, like the very bottom edge near the door frame, before working on the visible scratch. This confirms your pressure and speed won’t cause hazing where it matters.
Skip DIY polishing entirely on tinted windows, factory-coated glass, or any pane where you can’t confirm it’s tempered rather than laminated. If you’re unsure whether a film is aftermarket tint or a factory coating, a professional tint installer can help you identify it before you risk stripping it with abrasive.
How Do You Polish Out a Scratched Side Window Yourself?
Working through the repair in order matters more than rushing to the polishing stage. Skipping prep steps is the most common reason DIY jobs end up hazy instead of clear.
- Clean the glass thoroughly with alcohol-based cleaner and inspect it under bright, direct light or sunlight to map the scratch’s full length and depth.
- Mask the surrounding area with tape and plastic sheeting to keep cerium oxide paste off paint, rubber seals, and door trim.
- Mix the cerium oxide into a thick paste with distilled water, about the consistency of pancake batter.
- Load a felt pad on your drill or buffer and apply the paste directly to the pad and the scratch.
- Polish in low-speed circular passes, keeping the pad flat and moving constantly to avoid concentrating heat in one spot.
- Rinse and check every two to three minutes, since frequent optical checks during wet polishing catch hazing before it sets in permanently.
- Repeat the cycle up to eight to ten times for a shallow scratch, checking progress after each round.
- For gouges that catch a fingernail, clean the area, apply resin from a glass repair kit per its instructions, let it cure, then shave off excess with a fresh razor blade before a light final polish.
Most DIYers see a shallow scratch fade to barely visible within 20 to 30 minutes of active polishing per pane. If you’ve completed eight or more passes with no real improvement, or if the scratch is starting to look wider or hazier rather than fainter, stop. That’s your signal the damage goes deeper than a home kit can handle, and continuing risks turning a cosmetic issue into a distortion problem.
Do WD-40, Toothpaste, and Baking Soda Actually Remove Scratches?
None of these household remedies remove a scratch. They mask it, and only under specific conditions.
WD-40 can make a shallow scratch temporarily less visible, but the effect isn’t permanent and testing found it usually took multiple applications before any difference showed at all. It fills the scratch line with oil rather than smoothing the glass surface, and that oil washes away with the next rain or car wash. Repeated use can also leave residue that damages wiper rubber and coatings, so wipe it off thoroughly if you use it at all.
Toothpaste and baking-soda pastes act as extremely mild abrasives that can soften fine haze but rarely touch a scratch you can actually see and feel. Treat masking as acceptable only as a short-term glare reducer before a repair appointment, never as a substitute for one.
| Remedy | What it actually does | Limitation |
|---|---|---|
| WD-40 | Temporarily fills and hides shallow marks | Washes off, needs reapplication, leaves residue |
| Toothpaste | Buffs out fine micro-haze | Won’t fix visible scratches |
| Baking soda paste | Mild abrasive similar to toothpaste | Same limits, slower to work |
Masking a scratch without repairing it can create a false sense of security about how much damage is really there, particularly if the scratch sits where you need clear visibility.
When Should You Call a Professional Instead of Polishing It Yourself?
Certain signs mean it’s time to stop DIY work and get a technician involved:
- The fingernail test catches rather than glides
- The scratch sits directly in the driver’s sightline
- The damage is on an interior double-pane surface, which DIY tools can’t safely reach
- The glass has tint film or a factory coating you can’t strip without ruining
- You’ve completed several polishing passes with no visible improvement
Professionals use a staged abrasive progression, often starting with diamond pads for deeper damage and finishing with cerium oxide, which preserves optical clarity better than a single aggressive abrasive. This staged approach also protects tempered glass, since grinding too aggressively can weaken the compression layer that keeps tempered panes from shattering under stress.
Expect to spend relatively little on DIY materials if you already own a buffer, versus professional restoration costs that typically run $75 to $300 per pane depending on scratch depth and glass type. Full side window replacement becomes the better option once a scratch is too deep to polish safely or the glass shows cracking alongside the scratch.
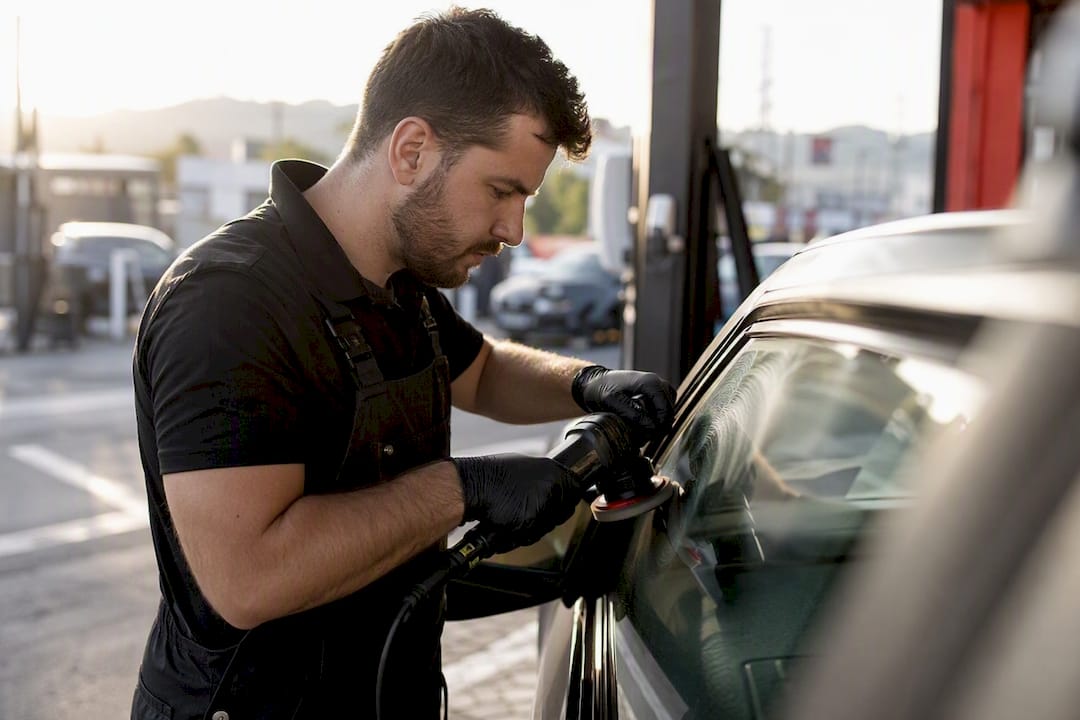
One more consideration modern vehicles raise: if a side window sits near a blind-spot sensor or camera housing, replacement or aggressive repair work nearby may require ADAS recalibration to keep those systems reading accurately.
Why a Trained Technician Handles Scratched Glass Differently
A trained eye catches the difference between tempered, laminated, and coated glass in seconds, something that’s much harder to judge from a driveway with a flashlight. Collision Auto Glass & Calibration has worked as a family-owned shop since 2008, offering same-day service and free mobile installation across Portland, so an inspection doesn’t require you to rearrange your whole day.
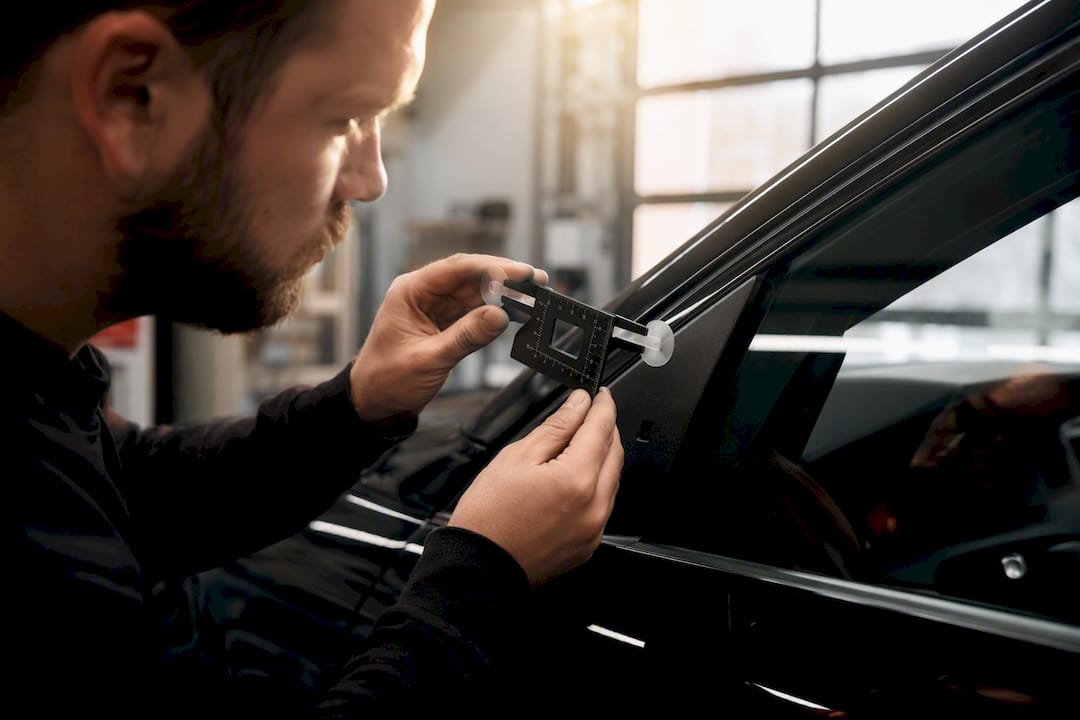
Every installation carries a lifetime no-leak guarantee, and the shop handles direct insurance billing when a repair or replacement is covered. For scratched side windows specifically, that means an assessment covers not just the glass itself but whether nearby ADAS sensors need recalibration after any repair work, reducing the risk of a rushed job leaving your safety systems misaligned.
What Most DIY Advice Gets Wrong About Scratched Glass
Most guides treat glass polishing like a car body scratch: buff it out and move on. That comparison undersells how differently glass fails. Paint can be re-clear-coated forever. Glass has a fixed thickness and a tempering process baked in at manufacturing, and every polishing pass removes material permanently. There’s no redo once you’ve ground too far.
The bigger issue is confidence. A shallow scratch that glides under a fingernail really is a reasonable weekend project, and cerium oxide with patience gets real results. But too many drivers extend that confidence to scratches that catch, or to windows with tint they don’t want to lose, because the first attempt looked promising. That’s where DIY turns into a bigger repair bill.
Our honest read: spend five minutes on the fingernail test and the sightline check before you spend an hour with a buffer. That decision matters more than which polish you buy.
— Collision Auto Glass & Calibration
Get a Professional Opinion Before the Scratch Gets Worse
If your fingernail catches on a scratch, or the mark sits somewhere you actually look through while driving, a quick inspection beats guessing. Collision Auto Glass & Calibration offers free mobile installation throughout Portland, so a technician can evaluate the pane at your home or office instead of you driving around with compromised visibility.

Before your visit, have your vehicle’s make, model, and year ready along with a description of where the scratch sits relative to your line of sight. If the damage turns out to be replacement territory rather than a polish job, same-day service means you’re not stuck driving on a damaged pane for days. Every installation includes a lifetime no-leak guarantee, and the team bills most insurance providers directly so you’re not stuck fronting the cost and waiting on reimbursement. Check how much glass replacement typically costs and request a quote to get a straight answer on your specific window.
Sources
- Does WD40 remove car scratches? And nine other things we learned testing car scratch removers – Which?
- Glass Scratch Removal and Restoration Techniques: DIY vs Professional Guide
- How To Remove Scratches From Car Windows At Home – Chemical Guys
FAQ
Can WD-40 remove glass scratches?
No. WD-40 only masks shallow scratches temporarily by filling them with oil, and the effect washes away, often requiring several reapplications.
Can scratches on windows be fixed?
Shallow surface scratches often improve significantly with cerium oxide polishing, but deep scratches that catch a fingernail usually need professional resin repair or replacement.
How do you remove scratches from car side glass?
Clean the glass, mask surrounding trim, and polish with a cerium oxide paste on a low-speed buffer, rinsing and checking progress every few minutes until the scratch fades or you determine it’s too deep for DIY.
Is it worth repairing scratched glass?
For shallow scratches, yes, since DIY materials cost far less than a full pane replacement; for deep or sightline scratches, professional restoration or replacement is usually the safer and more cost-effective route long term.
How can I prevent future scratches on my side windows?
Keep sand and grit off window tracks, avoid ice scrapers directly on glass, and clean windows with a dedicated glass cleaner rather than abrasive household cleaners or rough cloths.
Recommended
- Side Window Replacement Cost: 2026 U.S. Price Guide
- Is It Safe to Drive a Car With a Broken Window?
- Can a Crack at the Edge of Your Windshield Be Repaired?
🎧 Listen to This Article
Share
Recent Posts

October 15, 2026
Auto Glass Claims: Choose a U.S. Shop Before ADAS Billing Surprises
See how U.S. drivers can choose an auto glass shop for an insurance claim, confirm ADAS calibration, protect their rights, and prevent billing...
October 14, 2026
Fleet Windshield Maintenance: A 20 Minute Repair Can Prevent Days Down
Catch chips early, log the VIN and photos, and require part number and ADAS calibration records to keep fleet vehicles moving and avoid...
October 13, 2026
Calibration After Collision Repair: Ask for Scans Before You Drive
Learn when collision repairs require ADAS calibration, how shops verify the work, and which scan records and paperwork to request before driving....