
Auto Glass Repair
Windshield replacement, front bumper repair, radar or camera module replacement, and ADAS-related trouble codes all trigger the need for Honda Sensing calibration. The safest path is straightforward: book an OEM-compatible calibration that includes static aiming, dynamic re-learn, or radar re-aim as needed, and insist on a documented pre- and post-calibration diagnostic report before you drive away.
TL;DR:
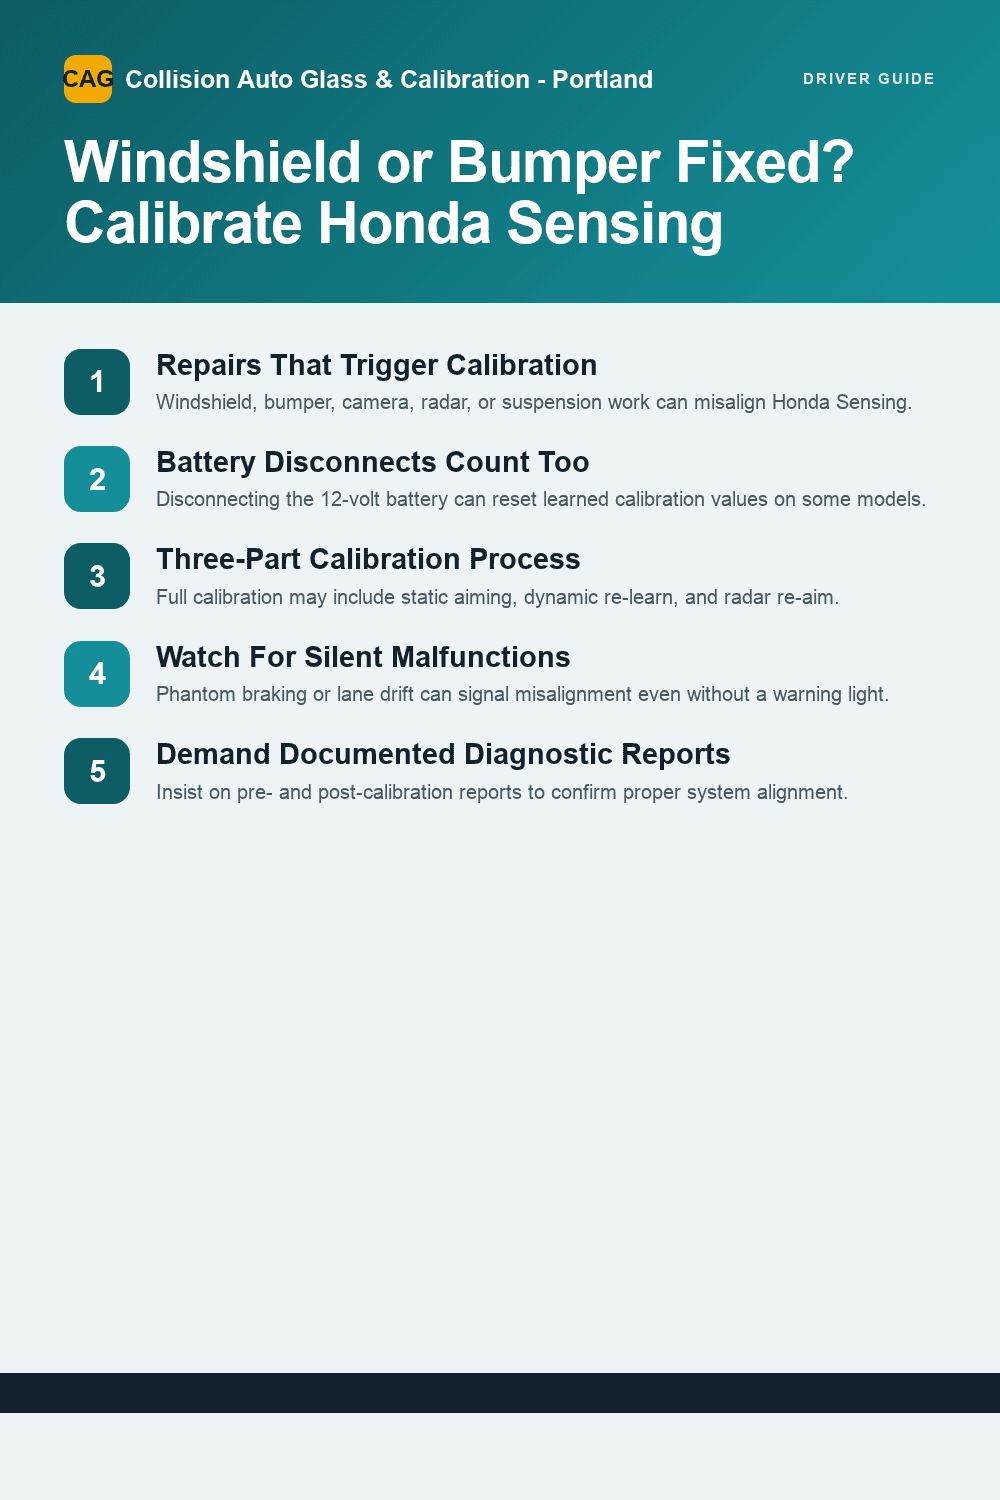
- Calibration is mandatory after windshield, bumper, or radar unit repairs, especially if the camera bracket or radar module was removed or reset.
- A full calibration involves static aiming, a dynamic re-learn drive, and possibly radar re-aim, depending on the trim and type of repair.
- Using OEM glass and brackets significantly improves the chances that calibration will succeed on the first attempt and remain accurate over time.
- Symptoms like phantom braking or lane drift may indicate a mis-aimed system that requires recalibration, even without warning lights.
- Owners should demand documented pre- and post-calibration reports from shops performing this work to ensure proper system alignment and avoid future liabilities.
Table of Contents
- When Does Honda Sensing Calibration Become Necessary?
- Static Aiming, Dynamic Re-Learn, and Radar Re-Aim Explained
- Why OEM Glass and Bracket Fit Change Camera Accuracy
- Symptoms That Signal Honda Sensing Needs a Recalibration
- What Does a Honda Sensing Calibration Cost and Take?
- Can You Calibrate Honda Sensing Yourself?
- Preparing Your Vehicle for a Calibration Appointment
- Why a Certified Shop’s Documentation Matters More Than You Think
- Ready to Book Your Honda Sensing Calibration?
- A Safety-First Take on ADAS Calibration and Liability
- Sources
- FAQ
When Does Honda Sensing Calibration Become Necessary?
Honda Sensing relies on a front-facing camera mounted near the rearview mirror and, on many trims, a millimeter-wave radar unit behind the front bumper. Move either component even a fraction of a degree out of position, and the system’s read on lane markings, following distance, or oncoming traffic goes off. That is why Honda’s own service materials treat certain repairs as automatic calibration triggers, not optional extras.
The manufacturer’s guidance is blunt about it: Honda Sensing owner documentation warns that windshield replacement or repair near the camera housing, along with any parts replacement close to the camera or radar mounting points, can throw off the system’s aim. Here is the short list of events that should send you straight to a calibration appointment:
- Windshield replacement or repair, especially if the camera bracket was removed or reset
- Front bumper repair, repainting, or replacement (radar sits behind it on many trims)
- Replacement of the camera unit, radar unit, or any related wiring harness
- Front-end collision repair, even when the camera and radar themselves look untouched
- Suspension or steering work that changes ride height or wheel alignment
- Any ADAS-related dashboard warning light or stored diagnostic trouble code (DTC)
Battery disconnects deserve their own mention because owners tend to underestimate them. Disconnecting the 12-volt battery to replace it, jump-start a dead vehicle, or perform unrelated electrical work can reset onboard modules and clear learned calibration values on some Honda models. Repairer Driven News reported that Honda specifically flagged battery reconnects as a scenario that can require recalibration, right alongside the more obvious collision-repair triggers. It is not always visible in a warning light. The system might still function, technically, while quietly running with a small angular error nobody flagged.
That gap between “no warning light” and “actually calibrated correctly” is where a diagnostic scan finds its place in the process. American Honda’s official position paper on post-collision repairs lists a full diagnostic scan as a minimum step after almost anybody work, because a scan can surface latent codes that a visual inspection misses entirely. The post-collision diagnostic and calibration position.pdf) names Honda’s i-HDS (Honda Diagnostic System) as the only tool that reliably confirms whether a given repair left the ADAS systems in spec.
If you are not sure whether your specific repair qualifies, two resources settle it. First, the vehicle’s service manual lists calibration requirements by system and by model year, since a 2019 Accord and a 2026 CR-V do not necessarily share the same triggers. Second, and more practically, ask the shop doing the repair to run an i-HDS scan before they hand you the keys. A qualified technician can tell you in minutes whether your Civic, Accord, CR-V, or Pilot needs static aiming, a dynamic re-learn, radar re-aim, or some combination of the three. Skipping that question is how owners end up back at a shop three weeks later wondering why their adaptive cruise control keeps hunting for a car that is not there.
Static Aiming, Dynamic Re-Learn, and Radar Re-Aim Explained
Honda Sensing calibration is not one procedure. It involves up to three distinct steps, each addressing a different part of the system, and understanding what each one does helps you know whether your shop actually performed the job correctly.
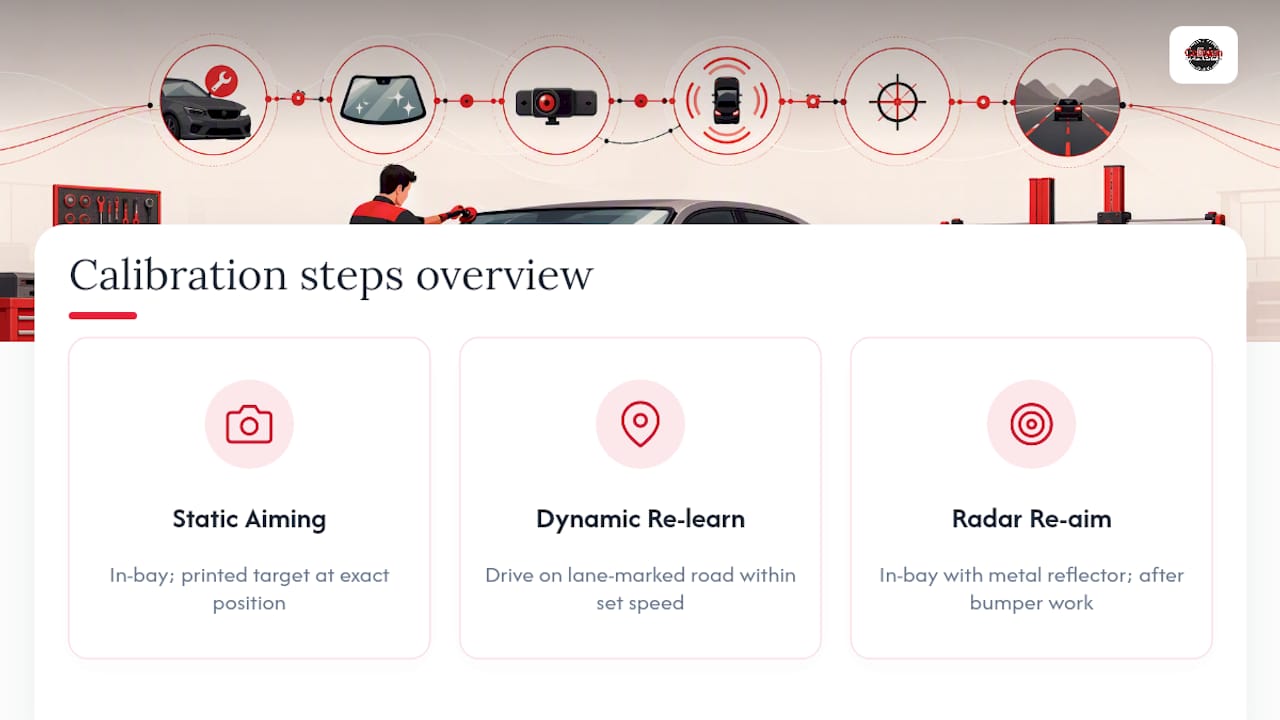
1. Static aiming. This happens in the bay, with the vehicle stationary. The technician sets up a physical calibration target, usually a printed board with precise geometric patterns, at an exact distance and height in front of the vehicle. Honda’s technical job aid on aiming procedures specifies target placement down to reference lines on the shop floor, because the camera has to see the target at a known angle to calculate its own position. The i-HDS software then walks the technician through the aiming routine, comparing what the camera reports against what it should report given that known target position. Get the target orientation or distance wrong by even an inch, and the whole calibration can pass a software checkbox while leaving the camera mis-aimed in the real world.
2. Dynamic re-learn. On many current Honda trims, static aiming alone does not finish the job. The vehicle then has to be driven, typically on a road with clear lane markings, within a specified speed range, often somewhere in a moderate speed band around typical city and suburban speeds, for a set distance before the system confirms the calibration. The camera uses that drive to cross-check its static aim against real lane geometry and moving traffic. Independent shop guidance on Honda Sensing calibration workflow confirms this two-step pattern is now standard on newer Civic, Accord, and CR-V trims rather than an occasional extra.
3. Bumper and millimeter-wave radar re-aim. Radar-equipped trims need a separate in-bay procedure using a different target, often a metal triangle reflector rather than a printed board, because radar measures reflected signal rather than a visual pattern. This step is required any time the front bumper is removed, replaced, or repainted, even if the windshield and camera were never touched. Skipping it on a radar-equipped vehicle is one of the more common reasons adaptive cruise control misjudges following distance after a fender repair.
Pro Tip: Ask your shop directly whether your trim requires a dynamic re-learn on top of static aiming. Some owners assume the in-bay work is the whole job, drive off, and only notice lane-keep drift days later on the highway.
One detail that trips up a lot of DIY-minded owners: dynamic re-learn is not optional busywork tacked onto static aiming for good measure. It is the step that catches errors static aiming cannot. A camera can be perfectly aimed to the target board and still behave oddly on a real curved road, because the target board is a controlled substitute for lane markings, not a perfect stand-in. That is part of why phantom braking and lane-centering drift often trace back to a skipped or rushed dynamic re-learn rather than a botched static setup.
Model-year and trim differences matter more here than most owners expect. A base-trim Civic without radar might only need camera calibration after a windshield swap. A Touring-trim CR-V or Pilot with both camera and radar-based ACC needs the full sequence: static aim, dynamic re-learn, and a separate radar re-aim if the bumper was involved. Honda’s job aid also notes that a four-wheel alignment is sometimes a prerequisite before aiming even begins, because a vehicle sitting slightly off its intended ride height or toe angle will never aim correctly no matter how careful the technician is with the target board.
Why OEM Glass and Bracket Fit Change Camera Accuracy
The windshield is not just a barrier against wind and debris on a Honda Sensing vehicle. It is an optical element the camera looks straight through, and its curvature, thickness, and clarity directly affect what the camera actually sees.
Honda’s owner guidance is specific about this: aftermarket glass and obstructions near the camera’s view window can interfere with accurate camera function. Every Honda windshield with Sensing has a dedicated camera viewing area, an optically correct patch of glass engineered to the same curvature and refractive index Honda’s engineers calibrated the camera against in the first place. A windshield that is close, but not identical, in curvature or tint can bend the light hitting that camera just enough to introduce a small but persistent error.
That mismatch shows up in a few recognizable ways:
- Distorted or wavy optics in the camera’s view window, even when the glass looks fine to the naked eye
- A slightly different curvature that changes the camera’s effective field of view
- Tint bands or ceramic coatings placed differently than the OEM design, which can scatter light near the sensor
- Bracket mounts that do not seat exactly where Honda’s original bracket sat, shifting the camera’s physical angle by a small but meaningful amount
Independent shop reporting on ADAS calibration failures consistently points to non-OEM glass and bracket fit as one of the most common reasons a calibration has to be repeated. A technician can follow the i-HDS procedure perfectly and still watch the calibration fail, or worse, pass on paper while leaving real-world mis-aim, simply because the glass itself is feeding the camera a slightly distorted picture.
None of this means aftermarket glass never works. It means the realistic expectation should be set upfront: OEM or genuinely OEM-spec glass gives the calibration the best chance of succeeding on the first attempt, holding steady over time, and avoiding a return trip. If a shop installs aftermarket glass, ask specifically how its optical specifications compare to Honda’s factory glass in the camera’s viewing area, and get that answer in writing before the appointment, not after a failed calibration attempt.
Symptoms That Signal Honda Sensing Needs a Recalibration
A mis-aimed camera or radar rarely announces itself with a dashboard warning. More often, it shows up as behavior that feels slightly wrong.
Watch for phantom braking, where adaptive cruise control slows down for a car that is not really there or is farther away than the system thinks. Lane Keeping Assist System drift is another common tell: the car nudges toward one side of the lane instead of holding center, or it hesitates to correct when you drift near a lane line. False forward collision warnings that trigger on an empty road, and adaptive cruise control that follows too closely or too loosely regardless of the gap setting, round out the usual list.
One detail worth knowing: a small angular mis-aim frequently does not set a diagnostic trouble code at all. The system can be off by a degree or two, enough to cause real, occasionally dangerous behavior on the road, without ever lighting up the dashboard. That is precisely why “no warning light” is not proof the system is fine after a windshield swap or bumper repair.
Before booking a full calibration appointment, a few quick checks can rule out simpler causes:
- Confirm nothing is obstructing the camera’s view window, no phone mount, parking permit, or dash cam sitting in front of the mirror
- Remove any aftermarket tint film or stickers near the windshield camera area
- Check tire pressure and ride height against factory specs, since a sagging or over-inflated vehicle changes the camera’s effective viewing angle
- Run a basic diagnostic scan for stored ADAS-related codes, even if no warning light is showing
If any of those checks turn up an obstruction or an obvious fix, clearing it might resolve the symptom without a full calibration visit. But if you have recently replaced the windshield, repaired the front bumper, had front-end collision work done, or disconnected the battery, and you are seeing any of the symptoms above, skip the guesswork and book a calibration appointment. Waiting rarely improves the situation, and driving with a mis-aimed forward collision warning system is not a risk worth carrying for the sake of convenience.
What Does a Honda Sensing Calibration Cost and Take?
Pricing depends mostly on how many procedures your vehicle needs, not just the fact that “calibration” is involved. A windshield-only camera calibration on a non-radar trim costs less than a full sequence that includes dynamic re-learn and a separate radar re-aim after bumper work. Vehicle model, whether the vehicle has both camera and radar-based ACC, and whether the shop bundles calibration with a windshield replacement all move the number.
| Procedure | Typical time | What drives the cost |
|---|---|---|
| Static camera aiming only | varies depending on repair and trim | Target setup precision, single-system scope |
| Dynamic re-learn drive | varies depending on repair and trim | Requires suitable road conditions and clear lane markings |
| Radar/bumper re-aim | varies depending on repair and trim | Separate target and tooling from camera aiming |
| Combined windshield replacement + full calibration | 2 to 4 hours | Glass work plus static, dynamic, and radar steps as needed |
National providers that bundle windshield replacement with recalibration, such as the workflow Safelite describes for Honda Sensing, reflect this same pattern: the glass swap itself is often the quicker part, while getting every ADAS system properly re-learned is what stretches a same-day appointment into a half-day commitment.
Whatever the final invoice looks like, do not accept it without a pre- and post-calibration diagnostic report. That document is your proof, generated by the i-HDS scan tool itself, that the camera and radar systems were checked before work began and confirmed within spec afterward. It matters for three practical reasons: it protects you if a dealer or another shop questions the repair later, it gives your insurer objective documentation for a claim, and it is the only real evidence that the calibration passed rather than merely being attempted.
Can You Calibrate Honda Sensing Yourself?
Short answer: not reliably, and the reasons come down to tooling and target geometry rather than mechanical skill. Static aiming requires i-HDS software paired with a precisely placed calibration target, measured to exact distances and angles from the vehicle using reference lines most home garages have no way to reproduce. A tape measure and a printed image taped to a wall will not replicate the geometry Honda’s engineers built the procedure around.
There are a few things an owner can legitimately try. Clearing the camera’s view window of obstructions, checking tire pressure, and running a basic code check with a consumer OBD-II scanner can catch simple issues. But those steps address symptoms, not root causes. If the camera or radar is genuinely mis-aimed, no amount of cleaning the windshield or resetting a warning light fixes the underlying angle error. Only a proper aiming procedure does that.
Pro Tip: If a dashboard ADAS light clears itself after a battery reconnect, do not assume that means the system recalibrated. Clearing a light and correcting an aim are two different things, and only an i-HDS scan confirms which one actually happened.
Insisting on a documented OEM-compatible procedure matters beyond just getting the system working again. Insurers increasingly ask for calibration documentation when processing collision or glass claims. A future buyer’s pre-purchase inspection can flag missing calibration records as a red flag on a vehicle’s repair history. And if a mis-aimed system contributes to a future accident, “we tried to fix it ourselves” is not a position anyone wants to be in. A shop with proper radar sensor calibration equipment and i-HDS access removes that risk from the equation entirely.
Preparing Your Vehicle for a Calibration Appointment
A little prep work on your end helps the calibration succeed on the first attempt instead of requiring a second visit.
- Fill the fuel tank to at least half, since a very low fuel level can affect ride height on some models and throw off the camera’s reference angle.
- Check tire pressure against the door-jamb specification sheet, and remove any roof rack cargo, bike racks, or roof boxes that change the vehicle’s stance.
- Confirm the ride height looks normal, no sagging rear suspension from a trunk full of gear, since Honda’s job aids treat ride height as a real prerequisite for accurate aiming.
- For mobile service, make sure there is a flat, level surface with enough clearance in front of the vehicle for target placement, plus a nearby stretch of road suitable for the dynamic re-learn drive, as explained in this rental vehicle inspection guide covering fleet-level site preparation and inspection best practices.
- Bring your registration and any prior repair documentation, especially if the calibration follows an insurance claim, and ask upfront whether you will receive a written pre- and post-calibration report.
Daylight conditions help the dynamic re-learn step go smoothly, since the camera reads lane markings more reliably in good light than at dusk or in heavy rain. If you are booking calibration alongside a windshield replacement, ask the shop directly how long the combined appointment typically runs so you can plan your day around it rather than guessing.
Why a Certified Shop’s Documentation Matters More Than You Think
Choosing where to get Honda Sensing calibrated done is really a question of documentation and tooling, not just convenience. A shop that owns its own i-HDS-compatible calibration equipment and performs the work in-house, rather than farming it out to a third party, controls the entire chain from windshield installation to final aiming confirmation.
Calibration work should happen in-house using dedicated ADAS equipment rather than a subcontracted step tacked onto a glass job. That matters because every handoff between a glass installer and a separate calibration shop is a point where documentation can get lost or a scheduling gap can leave a vehicle driving around mis-aimed for days.
Every completed job comes with a documented pre- and post-calibration diagnostic report, giving owners and insurers the same kind of paper trail that American Honda’s post-collision position calls for as minimum practice. That report is the objective proof a repair met Honda’s pass criteria, not just a verbal assurance that “it’s fine now.”
A few specifics worth knowing before you book:
- Same-day service and free mobile installation may be offered within some service areas, which matters when a dynamic re-learn needs a real road drive right after the in-bay work
- Some installations carry a no-leak guarantee, covering the glass work that precedes the calibration itself
- Direct insurance billing can remove the paperwork burden from the owner when a claim covers the repair
Ready to Book Your Honda Sensing Calibration?
If your Honda needs calibration after a windshield replacement, a bumper repair, or a battery disconnect that triggered an ADAS warning, request the full sequence by name: static camera calibration, dynamic re-learn, and bumper or radar re-aim if your trim is radar-equipped. Ask specifically for a pre- and post-calibration diagnostic report before you approve the work.
This work is often performed in-house rather than outsourcing the calibration step to a third party, which means one appointment can cover the glass, the aiming, and the documentation instead of two separate visits with two separate invoices. Mobile service may be available for the glass portion in some areas, and a typical combined appointment can run a few hours depending on how many ADAS systems your specific trim uses. Direct insurance billing may be available if your repair is covered by a claim, to avoid fronting the cost and waiting on reimbursement.
Start by requesting a quote through the auto glass repair and ADAS calibration page, and mention your specific Honda trim so the shop can confirm ahead of time whether your vehicle needs static aiming alone or the full static, dynamic, and radar sequence.
A Safety-First Take on ADAS Calibration and Liability
The conventional advice around ADAS calibration treats it like an optional upgrade, something you get around to if the dashboard complains loudly enough. That framing gets the risk backwards. A mis-aimed forward collision camera does not fail loudly. It fails quietly, nudging a following distance a little short or a lane-keep correction a little late, and most drivers adapt to that drift without ever realizing the system is compensating for an error rather than doing its job correctly.
Documentation is the part owners underestimate most. A pre- and post-calibration report is not paperwork for paperwork’s sake. It is the only evidence that separates “we performed a calibration” from “the calibration actually passed Honda’s own aiming criteria.” That distinction becomes very real the day an insurance adjuster, a resale buyer, or an accident investigator asks for proof.
Insist on the documentation every time, regardless of how minor the triggering repair seems. A skipped calibration on a bumper repair is just as real a gap as one skipped after a windshield swap.
— Collision Auto Glass & Calibration
Sources
- Honda Sensing (owner guidance) — Honda Owners
- Honda technical job aid — aiming procedures and requirements (ASL-H-1-21)
- Honda: Damage to common collision repair areas, reconnecting battery might require calibrations — Repairer Driven News
FAQ
How much does it cost to calibrate a Honda sensor?
Cost depends on how many procedures your vehicle needs: static camera aiming alone typically runs less than a job that also requires a dynamic re-learn drive or a separate radar re-aim after bumper work, with combined windshield replacement and full calibration appointments running longer and costing more than a single-system job.
How do I reset Honda Sensing problems?
Simple resets, like clearing an obstruction from the camera’s view window or checking tire pressure, can resolve minor glitches, but a genuine mis-aim requires an i-HDS-driven static aiming procedure, not a dashboard reset, since clearing a warning light does not correct the underlying camera or radar angle.
How do I recalibrate my windshield sensor?
Windshield sensor recalibration requires static aiming with a precisely placed target board and OEM-compatible diagnostic software, sometimes followed by a dynamic re-learn drive, which is why this work is done by a shop with OEM-compatible calibration equipment like Collision Auto Glass & Calibration’s ADAS calibration service rather than at home.
How much does it cost to calibrate a radar sensor?
Radar or bumper re-aim is typically priced as a separate procedure from camera aiming, since it uses different targets and tooling, and it becomes necessary any time the front bumper is repaired, repainted, or replaced on a radar-equipped Honda trim.
Do I need calibration after every windshield replacement?
Not every windshield replacement affects Honda Sensing, but any replacement involving the camera area or its mounting bracket does, and Honda’s own guidance recommends verifying calibration status any time work happens near the camera or radar mounting points.
Recommended
- Calibration After Windshield Replacement: What You Must Know
- Need a New Windshield? Don’t Forget Calibration
- Do I Need To Recalibrate My ADAS If I Replace My Windshield?
- Prove Your Windshield Calibration Is Correct With a Technician Checklist
🎧 Listen to This Article
Share
Recent Posts

September 13, 2026
Net VLT Math for Car Owners: Privacy Glass vs Tint and Legal Limits
Car owners: use net VLT math to compare factory privacy glass and aftermarket tint. Learn UV, heat, safety differences, legal limits, and an...

September 12, 2026
Acoustic Windshield: SAE Evidence and 3 Installer Questions
Learn how acoustic windshields cut up to 6 dB of high frequency road noise, SAE results, and 3 installer questions that protect your...
September 11, 2026
After Windshield or Bumper Repair? Book Honda Sensing Calibration
Schedule Honda Sensing calibration after common repairs. Covers static aiming, dynamic relearn, radar reaim, and i-HDS pre and post calibration reports....