Auto Glass Repair
If your rearview mirror fell off the windshield, you can reattach it yourself in most cases — as long as the mounting button is intact and no glass is missing from the windshield. Start by assessing the damage, securing the mirror so it can’t roll around or distract you while driving, then decide whether a DIY adhesive kit or a professional repair is the right call. Most drivers can complete a solid reattachment in under an hour using a mirror adhesive kit with activator, available at any U.S. auto parts store. If the adhesive pulled out a chunk of glass, or if your vehicle has ADAS cameras integrated near the mirror, stop there and call a qualified auto glass shop.
Key Takeaways
A rearview mirror that has fallen off the windshield can usually be reattached with a proper adhesive kit and activator, but glass damage or ADAS hardware makes professional service the safer choice.
| Point | Details |
|---|---|
| Assess the mount first | Check whether the mounting button and windshield glass are intact before buying a kit. |
| Activator is non-negotiable | Skipping the kit’s chemical activator is the leading cause of repeat mirror failures. |
| Cure time matters | Hold pressure for 2 minutes; wait at least 15 minutes before driving, overnight for full strength. |
| Legal risk is real | Most states require at least one functional rear-view mirror; a missing one can mean a fix-it ticket or failed inspection. |
| Collision Auto Glass & Calibration | Portland drivers can book same-day mobile service with a lifetime no-leak guarantee and in-house ADAS calibration. |
Table of Contents
- How to Reattach a Rearview Mirror That Fell Off the Windshield
- What You Need Before You Start
- How Long Does the Adhesive Need to Cure?
- Is It Legal and Safe to Drive Without an Interior Mirror?
- Why Do Reattached Mirrors Keep Falling Off?
- When Should You Call a Professional Instead of DIYing?
- Why Professional Service Is Worth It When You’re Unsure
- Collision Auto Glass & Calibration Handles It for Portland Drivers
- Sources
- FAQ
How to Reattach a Rearview Mirror That Fell Off the Windshield
Before you open the kit, remove the mirror arm from the baseplate. Bonding a small, flat baseplate to bare glass is far more reliable than trying to press the entire mirror assembly in place, and it gives you better control over alignment. Here is the full sequence, drawn from OEM-style reattachment guidance:
-
Remove the mirror from the baseplate. Use a small Allen wrench or screwdriver to loosen the set screw and slide the mirror arm off. Set it aside.
-
Mark the placement from outside the windshield. Before scraping anything, use a grease pencil or a strip of masking tape on the exterior glass to outline the old adhesive footprint. This gives you a precise target when you press the baseplate back on.
-
Scrape off old adhesive residue. Hold a razor blade at a low angle and work carefully across the bonding area on the windshield. Remove all old glue down to bare glass. Do the same on the baseplate’s bonding surface.
-
Clean both surfaces with isopropyl alcohol. Use a lint-free cloth and wipe the windshield spot and the baseplate face. Let both dry completely — 60 seconds is enough.
Pro Tip: After cleaning, don’t touch either surface with bare fingers. Skin oils are enough to compromise the bond. Handle the baseplate by its edges only.
-
Apply the kit’s chemical activator. This step is the one most DIYers skip, and skipping it is the leading cause of repeat failures. Follow the kit’s timing — most activators need 30–60 seconds to flash off before you apply adhesive.
-
Apply adhesive to the baseplate. Use only the amount the kit specifies — typically a small dot or thin bead. More adhesive does not mean a stronger bond; excess glue can squeeze out and weaken the joint.
-
Press the baseplate firmly onto the marked spot. Align it with your exterior tape mark, then hold steady pressure for about 2 minutes. Do not shift or rock it.
-
Tape the baseplate in place and let it cure. Apply masking tape across the baseplate to hold it against the glass while the adhesive sets. Popular Mechanics recommends a minimum cure of 15 minutes before touching it, with overnight curing giving the strongest result.
-
Remount the mirror arm and tighten the set screw. Slide the arm back onto the baseplate and snug the screw — firm, not overtightened.
-
Check alignment before driving. Sit in the driver’s seat and confirm the mirror gives you a clear view of the road behind you.
What You Need Before You Start
A full rearview mirror repair kit — adhesive plus activator packaged together — is the right choice over buying components separately. Kits are formulated so the activator and adhesive work as a matched pair, which matters for cure time and bond strength. Buying a generic epoxy or super glue and hoping it holds is a common mistake that leads to the mirror falling again within weeks.
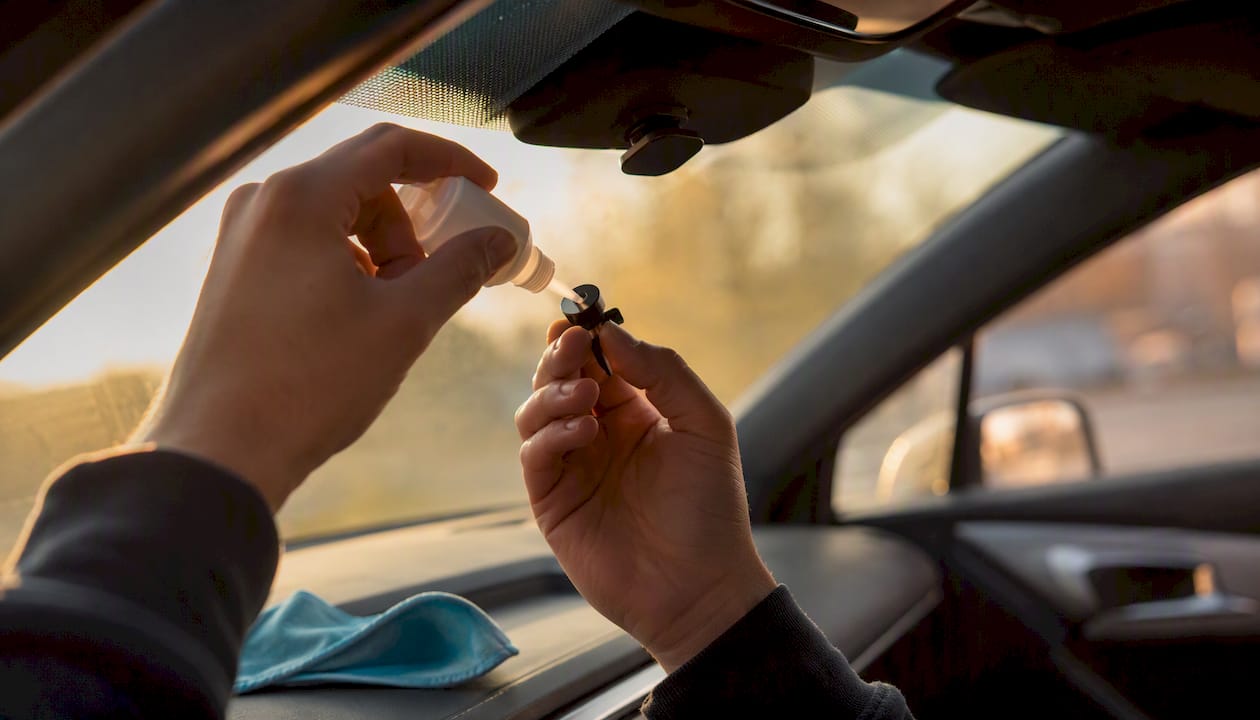
Widely available kit options in the U.S. include Permatex Rear View Mirror Adhesive (sold as a two-part kit with activator), 3M mirror bonding adhesive products, and universal rearview mirror repair kits stocked at AutoZone, O’Reilly Auto Parts, Advance Auto Parts, and most Walmart automotive sections. All three product lines follow the same activator-plus-adhesive approach; the differences are mostly in packaging size and cure time claims.
Pro Tip: Buy a kit, not just a tube of adhesive. The activator is what makes the bond permanent. Kits typically cost $5–$15 and include everything you need for one repair.
Here is the complete tool list:
- Razor blade or plastic scraper (for removing old adhesive)
- Isopropyl alcohol, 70% or higher, and lint-free cloths
- Rearview mirror adhesive kit with activator (Permatex, 3M, or equivalent)
- Masking tape or grease pencil (for marking placement)
- Small Allen wrench or flathead screwdriver (to remove the mirror arm)
- Hair dryer or heat gun on low setting (for cold-weather repairs only)
For a broader look at what a complete auto repair prep checklist covers, the auto repair checklist guide from Dent Erasers is a useful reference for readers tracking multiple vehicle fixes.
How Long Does the Adhesive Need to Cure?
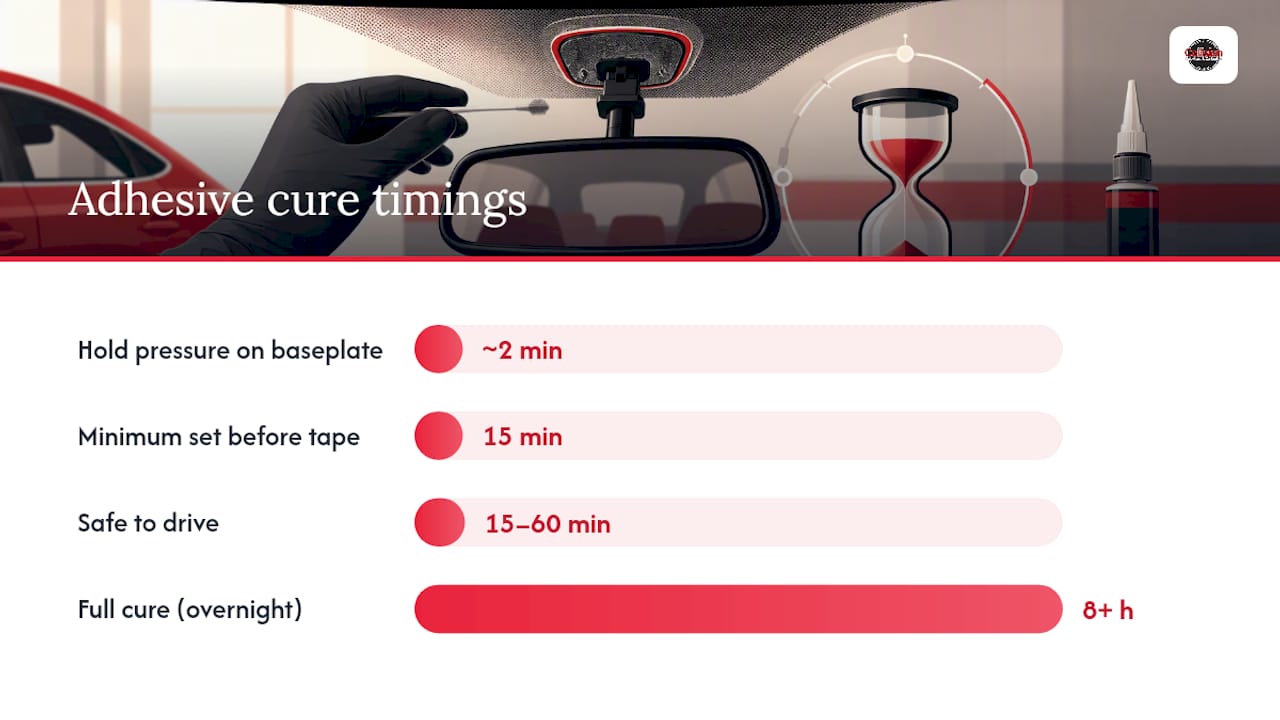
Cure time is where patience pays off. Rushing this step is the second most common reason a reattached mirror falls again. The table below summarizes the key timing milestones and temperature conditions for a reliable bond.
| Stage | Timing | Notes |
|---|---|---|
| Hold pressure on baseplate | ~2 minutes | Firm, steady pressure; do not shift |
| Minimum set before removing tape | 15 minutes | Mirror arm should stay off during this period |
| Safe to drive (short trip) | 15–60 minutes | Avoid highway speeds or vibration if possible |
| Full cure / strongest bond | Overnight (8+ hours) | Best practice whenever schedule allows |
| Ideal ambient temperature | 50°F–75°F | Outside this range, bond quality may suffer |
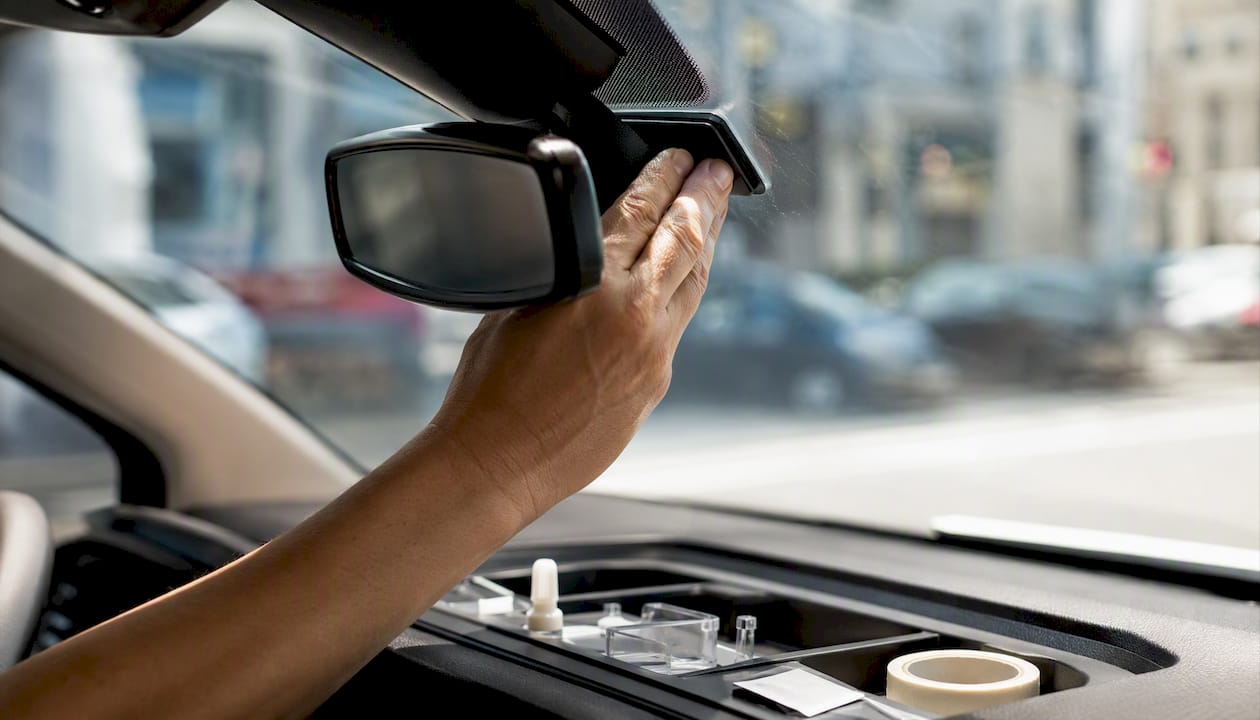
In cold weather, gently warm the windshield with a hair dryer on a low setting for a minute or two before applying adhesive. This brings the glass surface closer to the ideal cure range. Avoid concentrating heat in one spot or using a heat gun at high power — rapid temperature changes can crack cold glass. If temperatures are below 40°F, park the vehicle in a garage for an hour before starting the repair.
In very hot conditions (above 90°F), work in shade and let the glass cool before applying the kit. Extreme heat accelerates the adhesive’s open time, which can cause it to skin over before the baseplate is properly seated.
Is It Legal and Safe to Drive Without an Interior Mirror?
The short answer: it depends on your state and your vehicle’s remaining mirrors. State mirror laws vary, but most states require at least one mirror that gives the driver a clear view of the road behind the vehicle. In many states, if your vehicle has two functional side mirrors, the absence of an interior rearview mirror may not be a citable violation on its own. However, if a side mirror is also missing or obstructed, you are almost certainly out of compliance.
The legal risk is real. A missing or nonfunctional mirror can result in a fix-it ticket, a failed safety inspection in states that require them, and potentially serve as evidence of negligence if you are involved in a crash. Driving without a functioning interior mirror measurably increases blind spots and raises crash risk, particularly when changing lanes or reversing. Professionals advise treating a fallen mirror as a functional safety issue, not a cosmetic one, and repairing it promptly.
If you need to drive before the repair is complete, adjust both side mirrors for maximum rear coverage and keep trips short and local. A clip-on or suction-cup aftermarket mirror can serve as a temporary solution that keeps you legal and visible. Keep any repair receipts — they document good-faith compliance if you receive a fix-it ticket. For inspection-related questions, this guide on windshield inspection compliance covers what inspectors typically look for.
Why Do Reattached Mirrors Keep Falling Off?
A mirror that falls a second time almost always traces back to one of a handful of fixable mistakes. Here is what goes wrong and what to do about it:
- Poor surface prep. Old adhesive residue left on the glass or baseplate prevents a clean bond. Re-scrape both surfaces to bare material before trying again.
- Skipping the activator. Auto-glass technicians consistently identify this as the top cause of repeat failures. Use the activator every time, exactly as the kit directs.
- Too much adhesive. Excess glue squeezes out under pressure and creates a weak, uneven joint. Use only the kit-specified amount.
- Misaligned placement. If the baseplate shifts during cure, the mirror arm won’t seat correctly and stress concentrates at the bond edge. Mark the target spot before applying adhesive and don’t adjust once pressed.
- Curing in extreme temperatures. Adhesive that sets below 40°F or above 95°F often cures incompletely. Warm or cool the glass to the 50°F–75°F range first.
- Damaged or pitted baseplate. A baseplate with pitting, rust, or old adhesive craters won’t bond flat. Replace it — replacement buttons cost a few dollars at most auto parts stores.
- Glass damage at the bond site. If the adhesive previously pulled out a chip of glass, the surface is no longer flat or solid enough for a reliable DIY bond.
Pro Tip: If you have done everything correctly twice and the mirror still falls, the windshield surface at the bond point is likely compromised. That is the moment to stop DIY and call a professional — continuing risks making the damage worse.
When Should You Call a Professional Instead of DIYing?
Some situations genuinely require a shop. Knowing the threshold saves you time, money, and the safety risk of a mirror that falls while you’re driving.
Call a professional when:
- The adhesive pulled out a chunk of windshield glass, leaving a pit or crater at the bond site. A DIY kit cannot bridge structural glass damage — the area needs windshield repair or replacement before the mirror can be remounted.
- Your mirror mount integrates an ADAS camera, rain sensor, or lane-departure hardware. Even minor repositioning of these components can throw off sensor calibration. An uncalibrated ADAS system may give false alerts or fail to detect hazards — understanding what happens when ADAS goes uncalibrated explains the safety stakes clearly.
- You have attempted a correct DIY repair twice and the mirror keeps failing. At that point, the substrate, the baseplate, or both need professional assessment.
- You want a warranty on the repair, documentation for insurance, or a same-day mobile visit without sourcing tools yourself.
A qualified auto glass shop will replace the mounting button or baseplate, repair or replace the windshield if the glass is damaged, and recalibrate any ADAS sensors affected by the work. For Portland-area drivers, same-day mobile appointments are often available. When choosing a shop, these tips for selecting a reliable auto glass provider are worth reviewing before you book. Ask specifically about warranty terms, mobile availability, and whether the shop has in-house ADAS calibration equipment — not all shops do.
Why Professional Service Is Worth It When You’re Unsure
DIY mirror reattachment works well under the right conditions: the mounting button is intact, the windshield glass is undamaged, you have the correct kit, and you can cure the adhesive at the right temperature. When all those conditions are met, a $10 kit and an hour of careful work is a perfectly sound repair.
The problem is that most drivers don’t know whether the glass surface is truly sound until they scrape it and look closely. A hairline chip at the bond site, invisible under old adhesive, can cause a fresh repair to fail within days. And if your vehicle has ADAS hardware near the mirror, the cost of an uncalibrated system — in terms of safety and potential liability — far exceeds the cost of a professional visit.
At Collision Auto Glass & Calibration, the perspective is straightforward: DIY is appropriate when the conditions are right, and professional service is the better investment when there is any doubt about the glass, the mount, or the electronics. A shop with in-house calibration, a lifetime no-leak guarantee, and direct insurance billing removes the guesswork entirely. The repair either holds or the shop makes it right.
Collision Auto Glass & Calibration Handles It for Portland Drivers
When the DIY route isn’t the right fit, Collision Auto Glass & Calibration offers same-day mobile service throughout the Portland area, coming to your home, office, or wherever the vehicle is parked. There is no need to source tools, wait for adhesive to cure in uncertain weather, or wonder whether the bond will hold.
Services relevant to a fallen mirror include mounting-button reattachment, baseplate replacement, windshield repair and full replacement, and in-house ADAS calibration for vehicles with camera or sensor hardware near the mirror. Every installation carries a lifetime no-leak guarantee, and the team handles direct insurance billing so you are not managing paperwork. If you are unsure whether your repair qualifies for coverage, this insurance overview explains what most policies include.
To book, have your vehicle’s make, model, and year ready, and note whether your mirror has any integrated camera or sensor hardware. Call or request a quote online at Collisionautoglass — same-day appointments are frequently available.
Sources
- DIY rearview mirror replacement – O’Reilly Auto
- Is a Rear View Mirror Required by Law? Rules by State – LegalClarity
- Can You Drive Without a Rear View Mirror – Catalyst Legal
- How to reattach a rearview mirror (Popular Mechanics)
FAQ
Can I drive if my rearview mirror fell off?
It depends on your state and whether your side mirrors are functional. Most states require at least one mirror providing a clear rear view, and driving without one can result in a fix-it ticket or failed inspection. Keep trips short and adjust side mirrors for maximum coverage until the interior mirror is repaired.
How do I fix a rearview mirror that fell off the windshield?
Use a rearview mirror adhesive kit with a chemical activator. Scrape old adhesive from both surfaces, clean with isopropyl alcohol, apply the activator, then press the baseplate firmly for 2 minutes and allow at least 15 minutes of cure time before driving.
Is it common for a rearview mirror to fall off?
Yes, particularly in vehicles exposed to temperature extremes. Heat from direct sun degrades the original factory adhesive over time, and cold snaps can cause the bond to fail suddenly. A proper adhesive kit with activator creates a more durable bond than the original factory glue in many cases.
Will an auto glass shop reattach my rearview mirror?
A qualified auto glass shop can reattach the mirror, replace a damaged mounting button, repair any glass damage at the bond site, and recalibrate ADAS sensors if needed. Collision Auto Glass & Calibration offers same-day mobile service in the Portland area for exactly this type of repair.
Recommended
- The Hazards of Driving With a Cracked Windshield – Collision Auto Glass & Calibration
- Common Misconceptions about Auto Glass Repair – Collision Auto Glass & Calibration
- Back Window Replacement | Defroster Tested | Collision Auto Glass
- Rear Window Replacement Cost: Portland Driver’s Guide
🎧 Listen to This Article
Share
Recent Posts
October 15, 2026
Auto Glass Claims: Choose a U.S. Shop Before ADAS Billing Surprises
See how U.S. drivers can choose an auto glass shop for an insurance claim, confirm ADAS calibration, protect their rights, and prevent billing...
October 14, 2026
Fleet Windshield Maintenance: A 20 Minute Repair Can Prevent Days Down
Catch chips early, log the VIN and photos, and require part number and ADAS calibration records to keep fleet vehicles moving and avoid...
October 13, 2026
Calibration After Collision Repair: Ask for Scans Before You Drive
Learn when collision repairs require ADAS calibration, how shops verify the work, and which scan records and paperwork to request before driving....