Auto Glass Repair
Most bullseye chips under about 1 inch across are repairable with professional resin injection, and the window to save your windshield is shorter than most drivers realize. Acting within a few days before dirt or moisture settles into the break dramatically improves the odds of a clean, lasting result. If you just noticed the damage, here is what to do right now:
- Photograph the chip from multiple angles for your insurance records.
- Cover it loosely with clear packing tape to keep moisture and debris out.
- Avoid car washes, highway driving, and blasting the defroster until it is assessed.
- Book a professional assessment within 24–72 hours if the chip is quarter-sized or smaller and away from the windshield’s edge.
A bullseye chip, technically called a partial-cone impact break, leaves a circular impact point with a cone-shaped void in the outer glass layer. That structure makes it one of the most predictable chips for resin injection, which is why the industry treats it as a standard repair candidate when it meets basic size and location criteria.
Key Takeaways
Professional bullseye chip repair under 1 inch costs $60–$150, often $0 with comprehensive insurance, and same-day mobile service makes acting quickly easier than most drivers expect.
| Point | Details |
|---|---|
| Repairability threshold | Chips under ~1 inch, outside the edge zone and driver sightline, are typically repairable with resin injection. |
| Act within days | Dirt, moisture, and thermal cycling worsen chips fast; prompt repair improves success rate and keeps costs lower. |
| Insurance often covers it | Comprehensive auto insurance frequently reduces out-of-pocket cost to $0 with direct billing through your shop. |
| DIY kits have real limits | Kits work only on tiny, fresh, dry chips outside the sightline; failed DIY attempts can complicate professional repair. |
| Collision Auto Glass & Calibration | Offers same-day mobile repair, lifetime no-leak guarantee, direct insurance billing, and in-house ADAS calibration in Portland. |
Table of Contents
- Can your bullseye chip be repaired? Diagnostic criteria explained
- DIY repair kits: what they can fix and where they fall short
- What professional bullseye chip repair actually involves
- How much does bullseye chip repair cost, and how long does it take?
- When your windshield needs full replacement instead
- How to protect a bullseye chip before your repair appointment
- How to choose a repair shop you can trust
- Why professional repair is usually the right call for bullseye damage
- Same-day bullseye chip repair in Portland with Collision Auto Glass & Calibration
- Sources
- FAQ
Can your bullseye chip be repaired? Diagnostic criteria explained
The short answer: size, depth, location, and contamination all determine whether a bullseye windshield chip is repairable or requires full replacement.
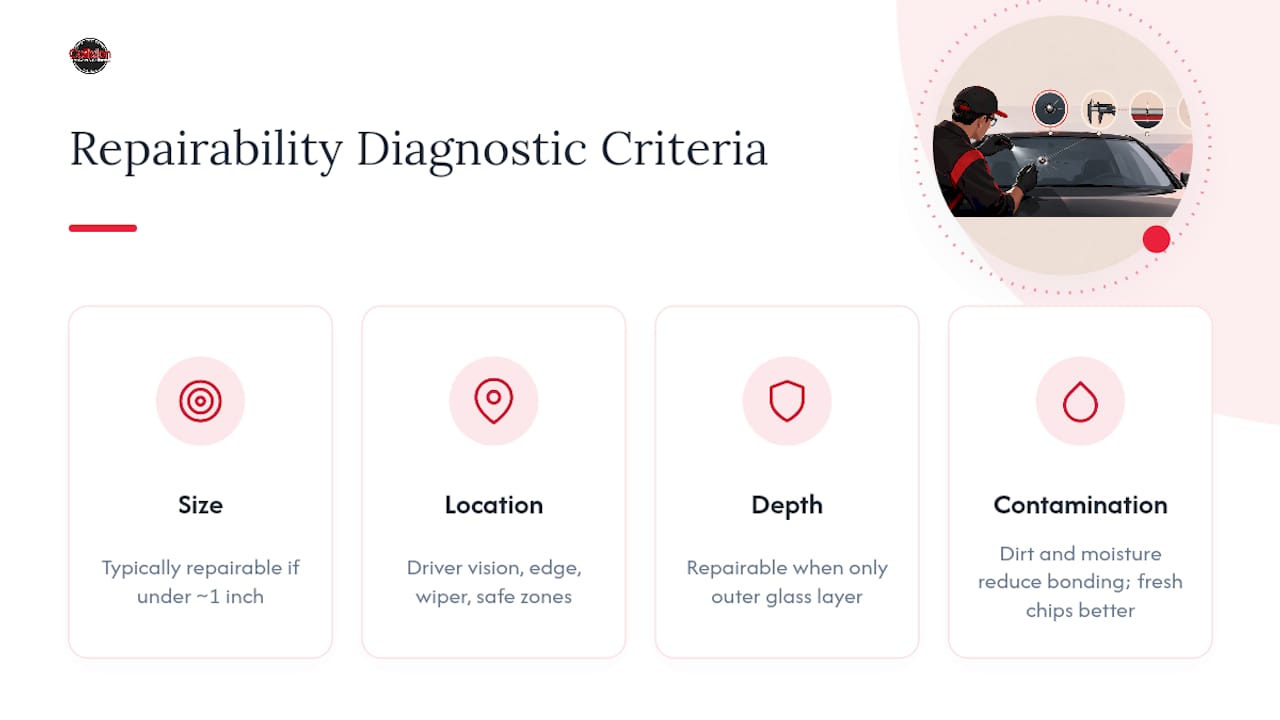
Size is the most straightforward threshold. A chip under roughly 1 inch (quarter-sized) is typically a clean resin-injection candidate; damage larger than a dollar bill’s width often requires replacement. The Permatex Bullseye Windshield Repair Kit, a widely available consumer product, advertises coverage up to approximately 1¼ inches, which gives you a rough sense of where the upper boundary sits for any repair method.
Location matters just as much. Industry repairability frameworks divide the windshield into zones: the driver’s critical vision area (directly in the driver’s line of sight), the edge zone (within about 2 inches of the frame), the wiper zone, and the general safe zone. Repairs inside the critical vision area risk optical distortion even when structurally possible, and edge-origin damage can destabilize the windshield’s structural bond. Both situations push toward replacement.
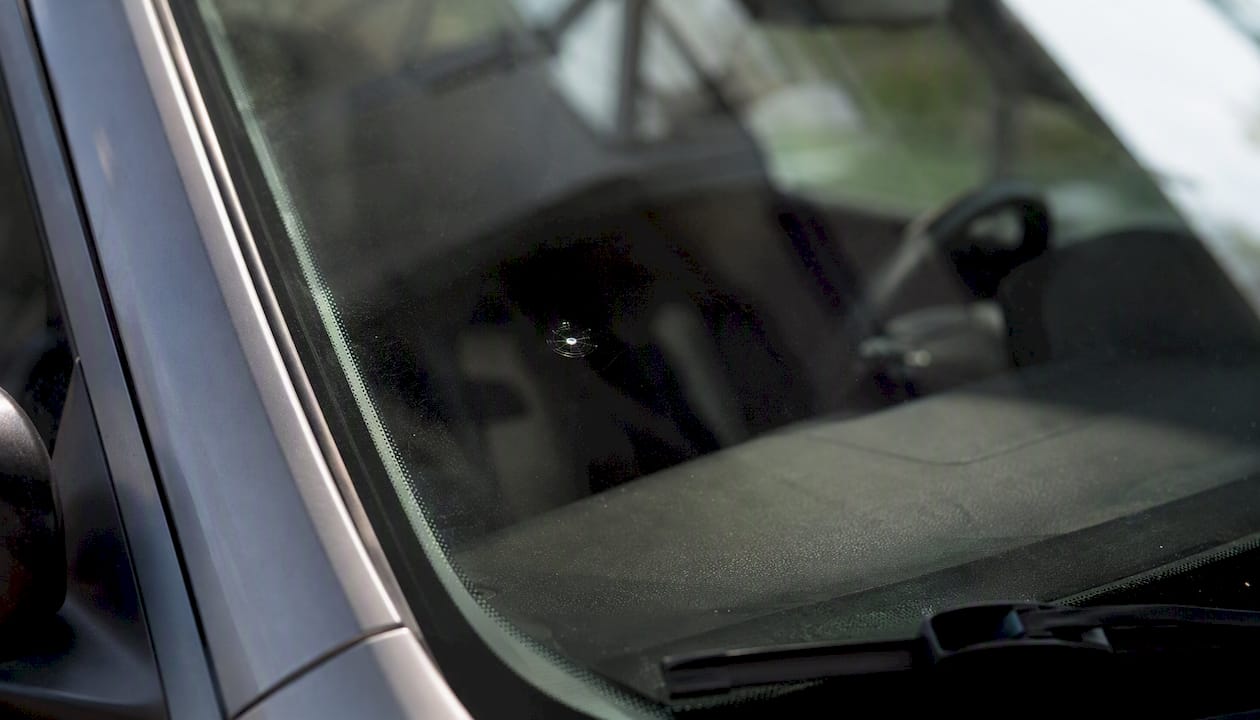
Depth and penetration are decisive. A bullseye that reaches only the outer glass layer is repairable. One that penetrates through to the inner laminate or the PVB interlayer is not, because resin cannot restore the structural integrity of the laminate itself.
Contamination and age quietly reduce your options. Dirt, road grime, and moisture that have worked into the break over days or weeks prevent resin from bonding cleanly. A fresh chip repaired the same day has a significantly better chip repair success rate than one left for a week in wet weather.
DIY repair kits: what they can fix and where they fall short
Consumer kits like the Permatex Bullseye Windshield Repair Kit (09103) are designed for small, fresh, single-impact bullseye damage on laminated windshields. The kit uses a pedestal applicator and UV-cure resin to fill the void and create an airtight bond. When conditions are right, the result is a permanent repair that stops the chip from spreading.
Here is the basic process most kits follow:
- Clean the chip area thoroughly and let it dry completely.
- Attach the adhesive pedestal directly over the chip center.
- Load the resin into the applicator and press it into the void, using the pedestal to create pressure.
- Work out trapped air bubbles by alternating pressure and vacuum cycles.
- Apply the curing strip and expose the repair to direct sunlight or a UV lamp for the manufacturer’s specified time.
- Peel the strip, remove the pedestal, and polish the surface with the included compound.
shows the pedestal-pressing and vacuum steps in detail. Following those steps exactly matters: skipping the air-purge cycle is the most common reason DIY repairs fail, leaving a cloudy or incomplete bond.
Pro Tip: Only attempt a DIY kit on a chip that is dry, clean, outside the driver’s direct sightline, and no larger than a quarter. Any moisture in the break will trap under the resin and turn the repair opaque.
The honest tradeoffs look like this:
- Cost: A kit runs roughly $10–$20 at most auto parts stores, versus $60–$150 for professional repair.
- Appearance: Professional repairs are nearly invisible under most lighting. DIY results vary and often leave a faint haze.
- Permanence: A well-executed kit repair can stop spreading, but the bond strength and clarity rarely match professional-grade resin equipment.
- Failure modes: Trapped moisture, incomplete air purging, and curing in low UV light are the three most common causes of a failed DIY repair.
- Warranty: No consumer kit comes with a professional guarantee. A failed DIY attempt can also complicate a subsequent insurance claim or professional repair, since contaminated resin is harder to remove.
Most shop guides recommend DIY kits only for very small, fresh chips that are dry and outside the driver’s sightline. Multi-leg star breaks, edge-origin damage, or any chip with visible penetration into the laminate should go straight to a professional.
What professional bullseye chip repair actually involves
A professional repair follows a more controlled version of the same resin-injection principle, but with commercial-grade equipment, calibrated vacuum pressure, and optical-clarity resin that consumer kits cannot match.
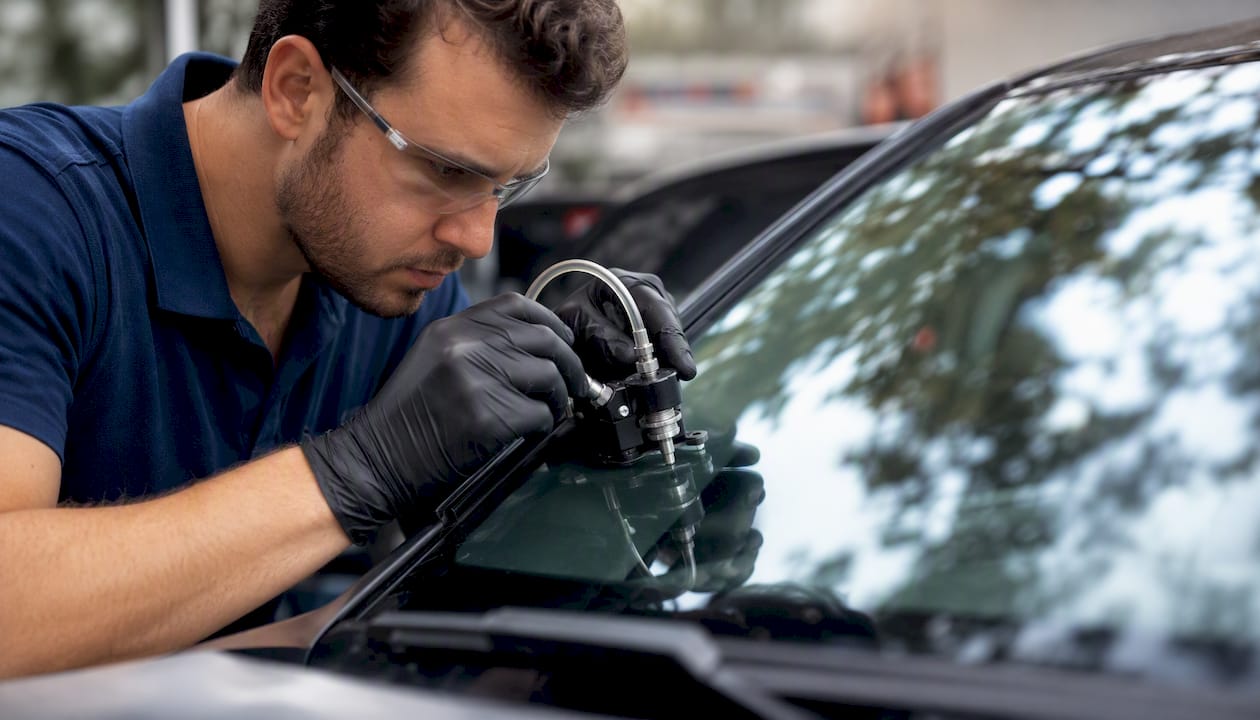
The standard workflow: the technician first inspects the chip under magnification to confirm it meets repair criteria, then cleans the area with a specialized pit cleaner to remove any contamination. A drill bit may be used to open a clogged pit before the injector bridge is mounted. The technician injects resin under precise vacuum and pressure cycles, purging air more completely than a hand-held pedestal allows. After curing under UV light, the surface is polished to restore optical clarity.
Mobile service brings this entire process to your driveway or office parking lot. For most bullseye repairs, there is no meaningful quality difference between mobile and in-shop work, since the repair requires no lift or alignment equipment. Some independent shops charge a small trip fee for mobile calls; others, including larger regional providers, price mobile service the same as in-shop. The convenience is real, and for a same-day repair, mobile service often means the chip never has a chance to collect more road debris.
The national average cost for a single professional chip repair runs $60–$150, with most straightforward bullseye repairs landing in the lower half of that range when the damage is fresh and small.
Trust signals worth looking for: a lifetime no-leak guarantee, direct insurance billing (so you do not have to file and wait for reimbursement yourself), and same-day availability. These are not marketing extras; they reflect a shop’s confidence in its work and its willingness to stand behind the result.
A successful professional repair leaves the chip structurally sound and visually close to invisible. Under direct sunlight at certain angles, a faint outline may remain, but the repair should not distort your vision or create glare. What it will not do is make the windshield look factory-new in every condition, and any shop that promises otherwise is overstating the technology.
How much does bullseye chip repair cost, and how long does it take?
Professional chip repair in the U.S. averages $60–$150 for a single chip, with additional chips in the same visit typically adding $10–$25 each. A consumer cost guide from Yelp puts the national average near $110 for a single repair, with fresh, small bullseyes at the lower end of the range.
| Factor | Typical impact on price |
|---|---|
| Single bullseye chip | $60–$150 |
| Each additional chip (same visit) | +$10–$25 |
| Mobile service trip fee (independents) | $0–$25 additional |
| Complex star or combination break | Higher end of range or replacement |
| Insurance with comprehensive coverage | Often $0 out of pocket |
A few practical notes on cost and scheduling:
- Most repairs take 30–45 minutes in the shop or at your vehicle.
- Same-day appointments are common for straightforward bullseye damage.
- Comprehensive auto insurance often covers chip repair with no deductible, making professional repair the cost-effective choice when coverage applies. Shops that offer direct insurance billing handle the claim on your behalf, so you pay nothing out of pocket and skip the paperwork.
- Mobile service from independent shops sometimes carries a small trip fee, but many providers absorb it into the standard rate.
For Portland-area pricing specifics, local rates generally track the national range, with same-day mobile availability reducing the need to factor in time off work.
When your windshield needs full replacement instead
Some damage is simply beyond what resin injection can address. Knowing the thresholds saves you from a repair attempt that delays necessary replacement.
Replacement is typically required when the chip exceeds roughly 1 inch in diameter, when a combination break (bullseye with radiating cracks) extends beyond about 6 inches, or when the damage has penetrated through the outer glass into the PVB interlayer. Edge damage within about 2 inches of the frame is also a replacement trigger, because that zone bears significant structural load and a repaired edge chip can compromise the windshield’s ability to support the roof in a rollover.
Modern windshields often use a thinner outer glass layer, sometimes around 2mm, which means a seemingly minor bullseye can convert into a combination break after one cold morning with the defroster running. If you notice any cracks radiating from the original impact point, the repair window has likely closed.
One more consideration: if your vehicle has ADAS features (forward collision warning, lane departure, automatic emergency braking), a windshield-mounted camera or sensor almost always requires recalibration after replacement. That adds time and cost to the job, but skipping it leaves safety systems operating on misaligned reference data. For a repair-only job, recalibration is generally not required.
How to protect a bullseye chip before your repair appointment
Speed matters more than most drivers expect. Thermal cycling and road vibration can turn a repairable chip into a spreading crack within hours under the right conditions.
Do:
- Keep the chip clean and dry. Blot away any moisture with a clean cloth.
- Cover the area with a small piece of clear packing tape to block debris and water.
- Photograph the damage immediately for insurance documentation.
- Park in a garage or shaded area when possible to reduce thermal stress.
Don’t:
- Pour hot water on a frosted windshield. The sudden temperature change can cause the chip to crack immediately.
- Run your defroster on high with a cold windshield if the chip is already present.
- Attempt a DIY kit on a combination break or any chip with visible radiating cracks.
- Delay more than a few days, especially in wet or cold weather.
For more on preventing future windshield damage, small habits like increasing following distance on gravel roads and avoiding highway driving directly behind large trucks make a measurable difference over time.
How to choose a repair shop you can trust
The right shop makes the repair straightforward. The wrong one can leave you with a failed repair, a voided warranty, or an uncalibrated ADAS system.
Questions worth asking before you book:
- What is your maximum repairable chip size, and do you assess depth before quoting?
- What warranty do you offer on the repair, and what does it cover?
- Do you handle direct insurance billing, or do I file the claim myself?
- If replacement is needed, do you perform ADAS calibration in-house?
- Is mobile service available, and is there a trip fee?
Red flags to watch for: a shop that pushes replacement without a clear diagnostic explanation, no written warranty on the repair, unwillingness to show before-and-after examples of similar work, or a vague answer about ADAS recalibration for vehicles that clearly have windshield-mounted sensors.
The clearest signal of a trustworthy provider is a combination of direct insurance billing, a lifetime no-leak guarantee, and a documented ADAS calibration process for replacements. Those three together indicate a shop that handles the full scope of modern auto glass work, not just the easy jobs. Specialized auto glass shops consistently outperform general body shops on these criteria because glass repair is their core competency, not a side service.
For a more detailed decision checklist, the auto glass shop selection guide at Collision Auto Glass & Calibration walks through the five most important evaluation criteria.
Why professional repair is usually the right call for bullseye damage
The DIY vs. professional repair debate is real, but the math usually favors calling a pro, especially when insurance is in the picture.
A $10–$20 kit sounds like a win until you factor in the failure modes: trapped air, incomplete cure, or a contaminated pit that makes the chip worse and harder for a technician to fix afterward. Professional resin equipment operates at calibrated vacuum pressures that consumer applicators simply cannot replicate, and the optical-clarity resins used in commercial repair are formulated to a different standard than what comes in a retail kit. When comprehensive insurance covers the repair at $0 out of pocket, the cost argument for DIY disappears entirely.
There is a reasonable case for a kit: a tiny, fresh chip on a vehicle with no comprehensive coverage, located well outside the driver’s sightline, repaired the same day it happened. Outside those specific conditions, the risk of a poor outcome outweighs the savings.
The shops that earn long-term trust are the ones that tell you honestly when a chip is too far gone to repair well, rather than attempting a repair that will look poor in six months. That transparency, backed by a lifetime guarantee, is what separates a safety-focused shop from one that is just moving cars through the bay.
Same-day bullseye chip repair in Portland with Collision Auto Glass & Calibration
When a chip meets repair criteria, the fastest path to a permanent fix is a same-day mobile appointment, and that is exactly what Collision Auto Glass & Calibration delivers across the Portland area. Free mobile installation means a certified technician comes to your home or workplace, no drop-off required. Every repair and installation carries a lifetime no-leak guarantee, and the team handles direct insurance billing so you are not chasing reimbursement on your own.
For vehicles requiring windshield replacement, Collision Auto Glass & Calibration performs ADAS calibration in-house, so your safety systems are properly recalibrated before you leave. That matters on any modern vehicle with a windshield-mounted camera or radar sensor. Family-owned and operating since 2008, the shop has built its reputation on doing the full job right the first time. Request a quote or book your repair today and get your windshield assessed before the chip has a chance to spread.
Sources
The following resources were used to verify repair thresholds, cost ranges, and product specifications in this article:
- Windshield Chip Repair Cost in 2026 | Prices, Insurance & When to Replace
- Average Cost of Windshield Chip Repair (2026 Price Guide) | UseCalcPro
- Windshield Damage Assessment: The Repair vs. Replace Decision Matrix | Windshield Advisor
- What is a Bullseye Windshield Chip? — Autorivet
FAQ
Can a bullseye windshield crack be repaired?
Yes, most bullseye chips under about 1 inch that have not penetrated the inner laminate and are not located at the windshield’s edge are repairable with professional resin injection. Chips that are contaminated, older than a few days, or located in the driver’s direct sightline may require replacement instead.
How much does it usually cost to repair a chip in a windshield?
Professional chip repair averages $60–$150 for a single chip in the U.S., with additional chips in the same visit adding roughly $10–$25 each. Drivers with comprehensive auto insurance often pay $0 out of pocket when their shop offers direct insurance billing.
Do bullseye cracks spread?
Yes. Left untreated, a bullseye chip can spread through thermal cycling (hot and cold temperature swings) and road vibration, converting a repairable chip into a crack that requires full windshield replacement. Covering the chip and booking a repair within a few days significantly reduces that risk.
Can a bullseye chip be repaired with a DIY kit?
A consumer kit like the Permatex Bullseye Windshield Repair Kit can produce an acceptable result on a very small, fresh, dry chip outside the driver’s sightline, but the finish quality and bond strength typically fall short of professional repair. Failed DIY attempts can also make subsequent professional repair more difficult by contaminating the pit with cured resin.
Recommended
Share
Recent Posts
September 8, 2026
Portland Drivers: Book Rock Chip Repair to Drive Away in 30–60 Minutes
Portland drivers: rock chip repairs often take 20–40 minutes of tech time and are drive-ready in 30–60 minutes. Booking tips, what to tell...

September 7, 2026
Car Owners: $30–$80 DIY to Fix Windshield Frame Rust or Hire a Pro
Quick owner workflow to spot and stop windshield frame rust: run a soapy-water probe, judge surface vs rot-through, then DIY ($30–$80) or get...
September 6, 2026
U.S. Drivers: Wait 24–72 Hours Before Washing a New Windshield
Installer approved stages for washing a new windshield: hand wash after 24 hours, touchless at 48, high pressure at 72. Inspect seals if...